Enlarge your photo using Photoshop’s new feature Super Resolution
Enlarge your photo using Photoshop’s new feature Super Resolution article is by Grey Chow, If you would like to write for us, please read here.
Recently, Adobe has added a new feature called “Super Resolution” to their Camera Raw 13.2 plugin on Photoshop.
The feature uses artificial intelligence to quadruple the resolution of your raw photos, turning a 12-megapixels image into a larger 48-megapixels image while keeping the details sharp and clean.
This is very helpful, especially when you want to make a large print of your photo; the extra resolution helps preserve high-quality details. If you use a low-res photo for a large print, the details will be blurry when you view the print at a closer distance.
Most importantly, the new Super Resolution feature is incredibly easy to use.
How to use Super Resolution on a RAW photo
1. First, open your image file into the Camera Raw plugin on Photoshop (it can be any RAW, JPEG, TIFF or PNG files).
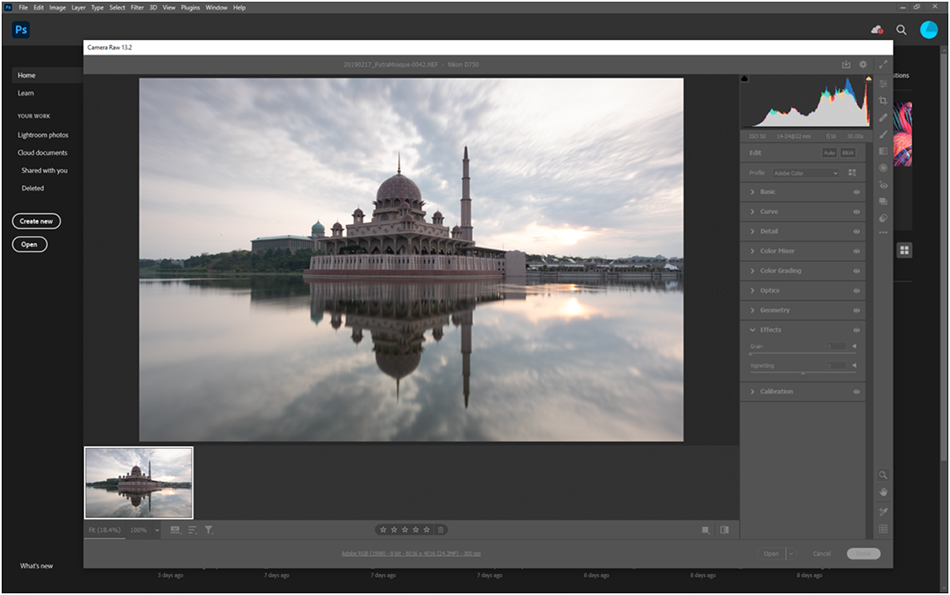
2. Once your image show on Camera Raw, right-click anywhere on your image and choose “Enhance…”.
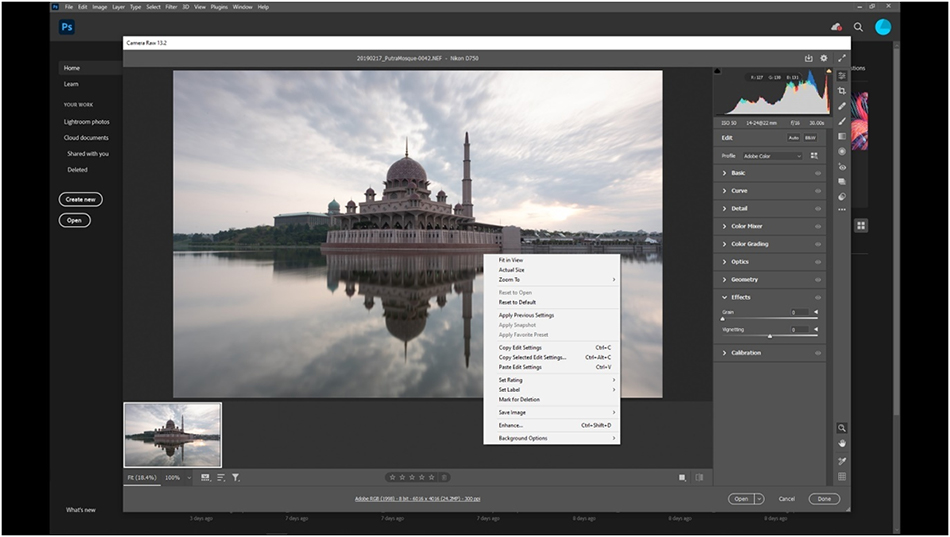
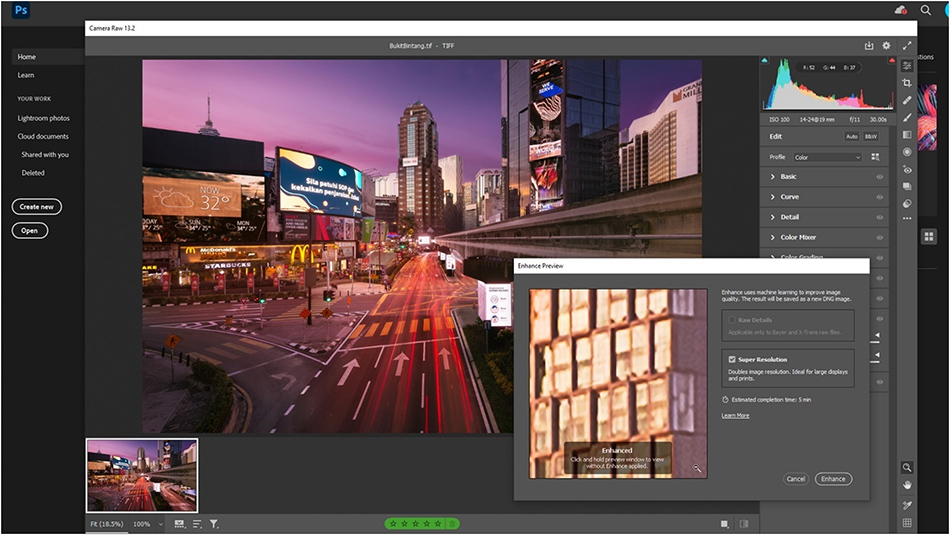
3. This brings up the Enhance Preview window from the above screenshot. Tick the checkbox beside the Super Resolution label and click Enhance to start upsizing your image. You can also click on the preview image on the left to give you an idea of how the details will be like after “enhancing”.

4. Once the enlargement process is completed, an additional image will be created and save in PNG file format. Select that file and open it in Photoshop.
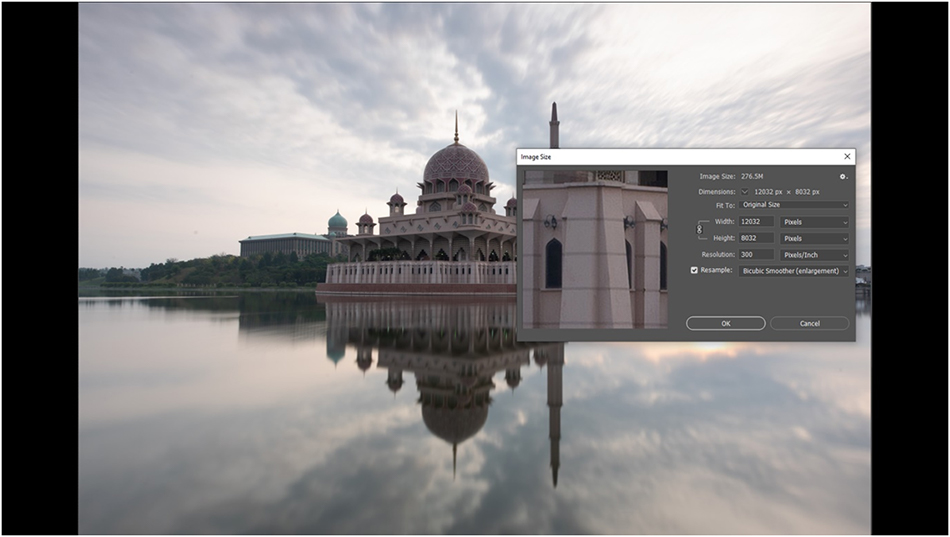
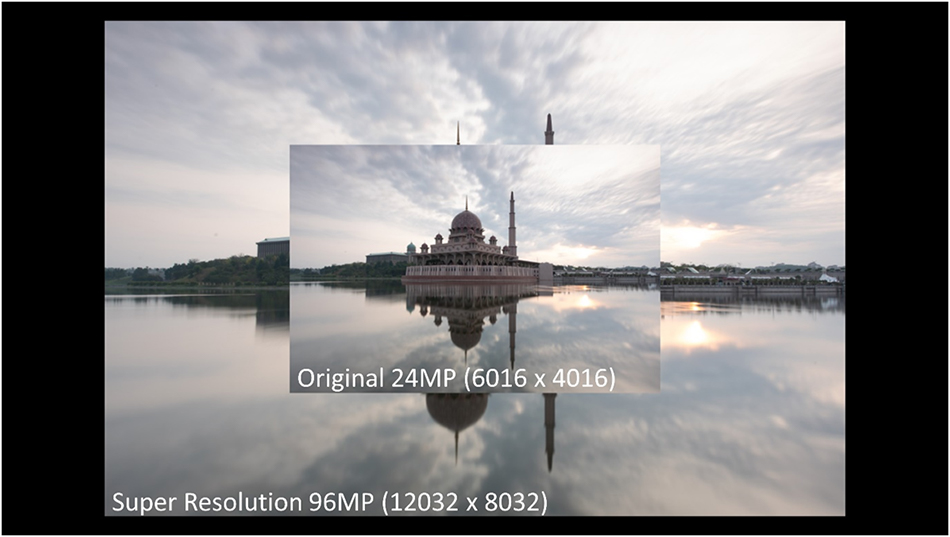
The above image was originally was 12-megapixels with 6016 x 4016 resolution. After applying “Super Resolution”, the image is now upsized to 92-megapixels with 12032 x 8023 resolution.
To give you a better idea of how big the size has increased, below is the comparison between the original image and the upsized version.
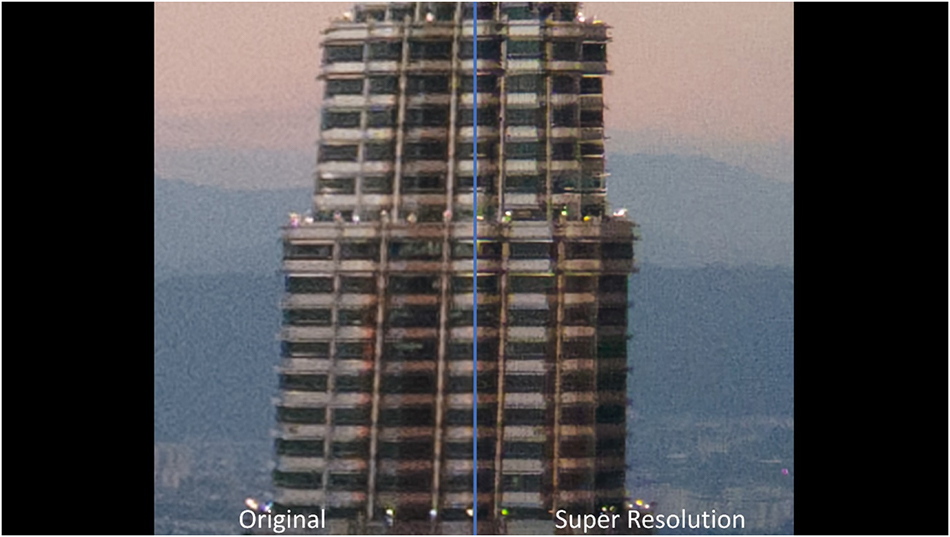
Here’s the best part about the “Super Resolution” feature. It will analyze your image to figure out how to preserve your image’s details during the enlargement process. There are two images in the below screenshot. The left image was upsized using the Image Size adjustment feature on Photoshop with Bicubic Smoother (Enlargement) option selected. The right image was upsized using Super Resolution.
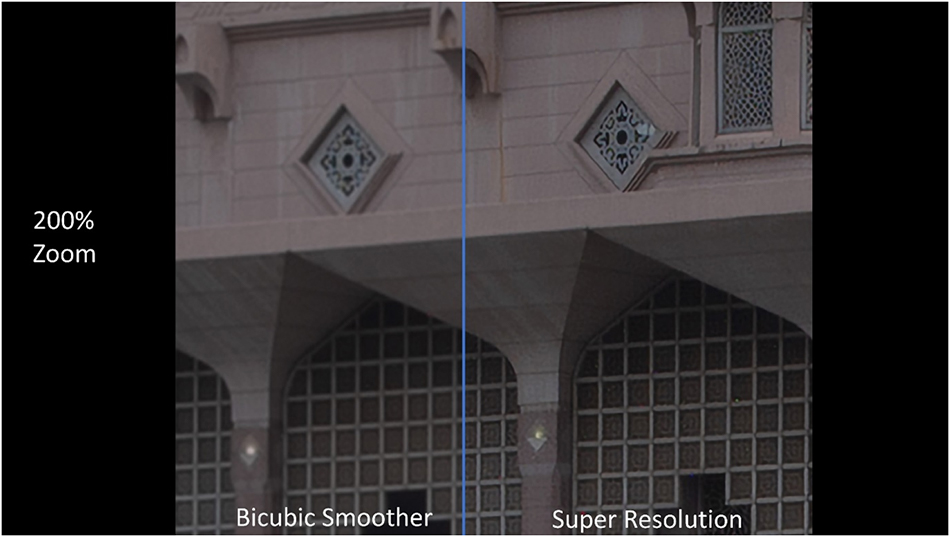
To make it easier to see the result on the web, I zoomed in on both images at 200%.
Using Super Resolution On An Edited Photo
I have also tested this new feature out with a few of my edited photos to experiment with the feature.

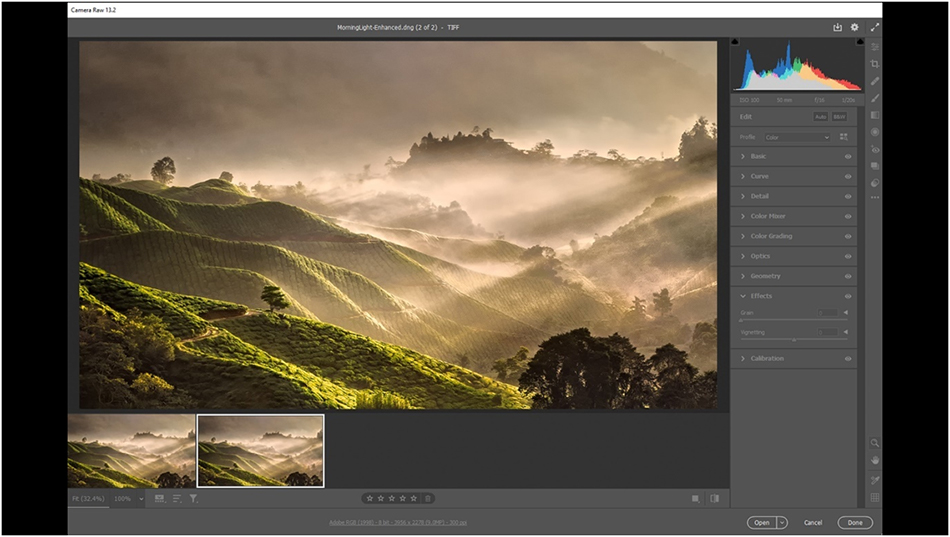
I saved my above photo into TIFF format and opened it on Camera Raw. Then I upsized the photo using the “Super Resolution” feature.
Below is the before and after comparison.
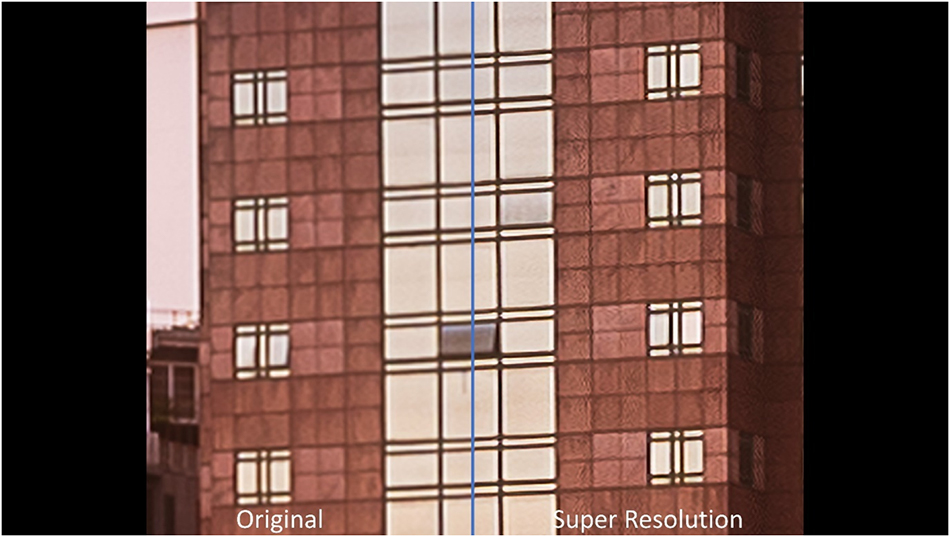
I want to highlight here that Adobe claimed that the result depends on the image quality of your photo. The better the image quality, the better the result you will get from the “Super Resolution”.
To verify that statement, I also did another test using a photo with lower image quality.
The previous two photos were captured using a Full Frame camera, but now I’m going to use a photo from my Dji Mavic Air2. It has a 12-megapixels, ½ inch camera sensor, which is a lot smaller than a Crop Senor or a Full Frame camera.
On top of that, I used ISO 400 to capture the shot. The photo contains quite an amount of noise, especially in the shadow areas.

After enlargement, the resolution of the image became 8000 x 6000 pixels. Originally it was only 4000 x 3000 pixels
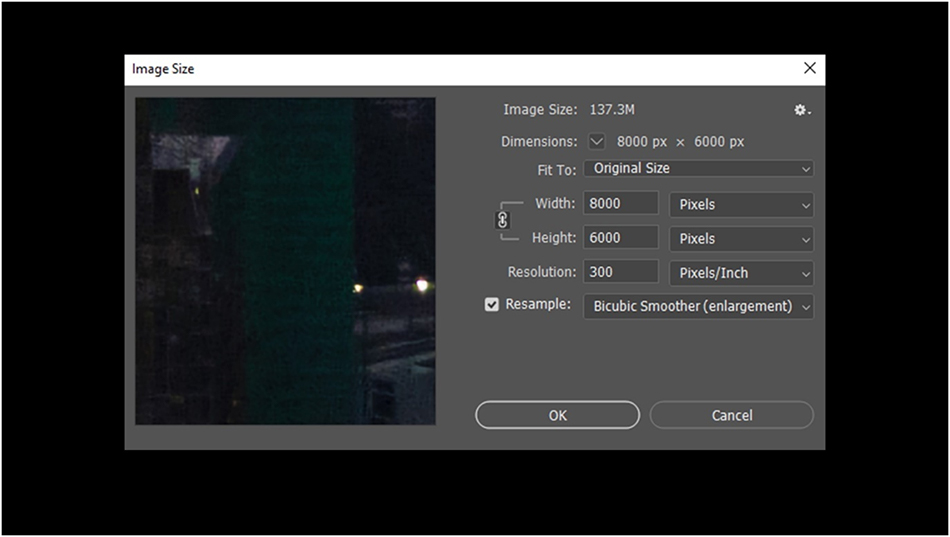
You can still see that the level of details has increased for the photo on the right, but the result is more subtle than the previous examples.
Perhaps, like what Adobe shared on their post. For the AI to understand how to upsample a given pixel, the computer needs some context, which it gets by analyzing the surrounding pixels.
If an image has lesser clarity, it may be more challenging for the AI to analyze the photo to perform any necessary detail enhancement.
The same thing also happened when I was trying to enlarge a very low res photo at 1978 x 1139 pixels. The photo from the above screenshot was edited and heavily cropped before.
For the best result, I think it always better to start with a RAW image instead of JPEGs or TIFFs, which is also what Adobe suggested.
Super Resolution In Adobe Lightroom
Currently, this feature only available on Camera Raw from Photoshop, but Adobe has announced the feature will come to both Lightroom and Lightroom Classic soon.
I’m looking forward to it as I usually start my editing workflow from Lightroom Classic before moving to Photoshop.
Summary from Grey Chow
Based on all my testing so far, the results are pretty amazing (using RAW photos with good image quality), and this is definitely a very welcome feature from Adobe. I will be able to create a larger print with better details than before now.
At the moment, the max resolution you can go is 65,000 pixel on the long edge or 500-megapixels. Adobe is in the middle of working to increase the limits in the future.
Grey is an award-winning travel photographer based in Kuala Lumpur, Malaysia. Passionate in Nature Landscape and Astronomy photography. Be sure to check out his website and Facebook page.
Other Articles on How to Enlarge your photo using Photoshop
Supersize Using Super Resolution in Photoshop
How to Enlarge Photos Without Losing Detail
How To Increase The Size Of A Photo In Photoshop
Thank you for reading this article on How To Enlarge your photo using Photoshop’s new feature Super Resolution. Be sure to sign up for our newsletter for more tutorials and great offers.
Enter your email below and join our community of more than 100,000 photographers who have
- Subscribed to our newsletter.
- Downloaded our FREE Photoshop Course.
- Use our FREE Easy panel in Photoshop.

