More Ways to Sharpen Images in Photoshop Tutorial
This beginner Photoshop tutorial will teach you four ways to sharpen photos in Photoshop. On top of that, you’ll learn the pros and cons of each sharpening tool and the importance of using smart objects in sharpening non-destructively.

The Best Way to Sharpen Images in Photoshop for the Web
Raya Pro has an amazing Sharpen and Resize For the Web fuction built directly into it. All you need to do is click one of the options:
1. Sharpen and Resize by Width
or
2. Sharpen and Resize by Height
Once you put the desired image size in and click OK your image will be sharpened and resized perfectly, ready to post online.
Editor’s Choice plugin on Adobe marketplace

Raya Pro, the most rated plugin on Adobe Marketplace.
Method One – The Quick Way To Sharpen Images in Photoshop
- Open your image in Photoshop
- Duplicate the Background layer
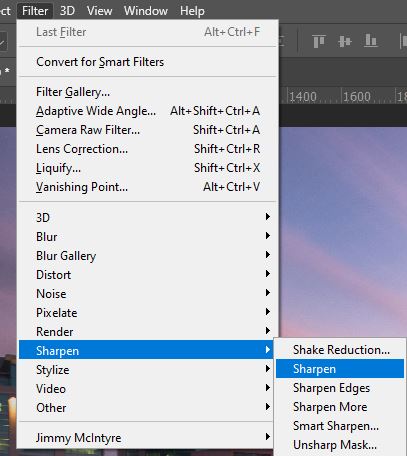
- Go to Filters section on the menu bar
- Select Filters>Sharpen>Sharpen
- Your image will be automatically sharpened
- If Sharpen didn’t sharpen enough, undo by clicking Edit>Undo
- Go to Filters>Sharpen>Sharpen More this will sharpen your image more
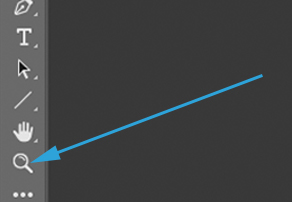
- To compare the changes made, Zoom in and toggle the Layer Visibility to see compare before and after sharpening.
Step-by-step Tutorial
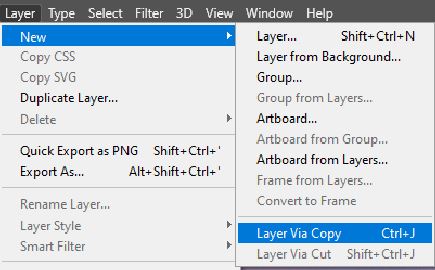
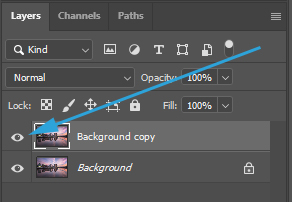
- Once your image is open in Photoshop, Duplicate the Background Layer. Do this by either holding down the Control key and press the J key on a PC (Crtl+J) or Command key and J on a Mac (cmd+J). Alternatively, on the top Menu to go Layer>New>Layer Via Copy.
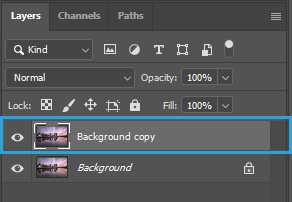
- To ensure your new layer is selected, click on the Background Copy layer so that it has a lighter shade of grey.
- Go to Filter>Sharpen>Sharpen.
- Your top layer image has now been sharpened. To compare the difference, Zoom into your image using the Zoon tool.
- Once Zoomed in toggle the Layer visibility of your top Layer by clicking on the Eye symbol in the layers panel.
Before And After Sharpen – Original Image on the Left, Sharpen Image on the Right
[compare]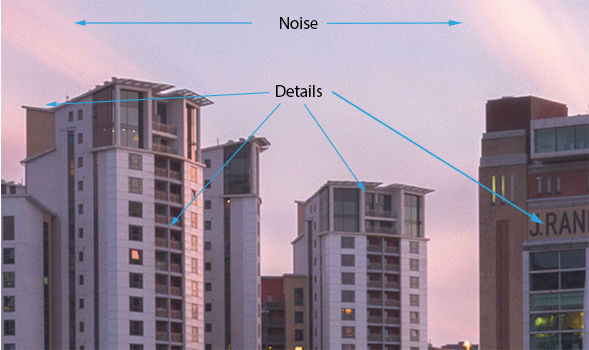
[/compare]
Pros & Cons to using the Sharpen Filter in Photoshop
Pros
Cons
- It is quick and easy
- It isn’t too over whelming
- It does a good basic job of sharpening an image
- Very Limited
- Adds Noise
- Pre defined settings
Enter your email below and join our community of more than 100,000 photographers who receive regular tutorials and have also

Subscribed to our newsletter,
Downloaded our FREE Photoshop Course
Got our FREE Easy Panel for Photoshop
And have our FREE Essential Guide To Luminosity Masks E-Book
Method Two – Using the Sharpen More filter in Photoshop
- Duplicate your Background Layer (Crtl+J PC) Cmd + J Mac).
- Select the Background Copy layer to work on by selecting it as before.
- Go to Filters>Sharpen>Sharpen More.
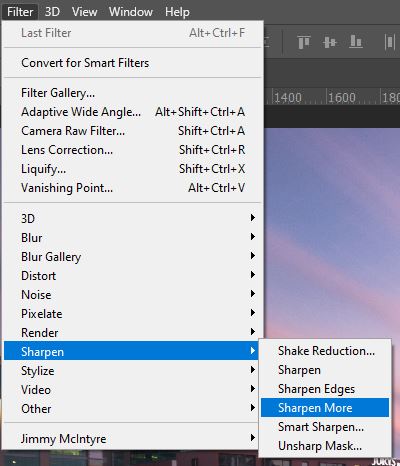
- Zoom into your picture.
- Toggle Layer Visibility to see the effects.
[compare]
[/compare]
Pros & Cons to using the Sharpen More Filter in Photoshop
Pros
Cons
- It is quick and easy
- It has a strong effect
- Can be easily undone
- Restricted settings
- Adds a lot of Noise
- Can make images look unnatural
Enter your email below and join our community of more than 100,000 photographers who receive regular tutorials and have also
Subscribed to our newsletter,
Downloaded our FREE Photoshop Course
Got our FREE Easy Panel for Photoshop
And have our FREE Essential Guide To Luminosity Masks E-Book
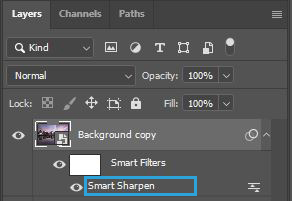
Method Three – How To Use Smart Sharpen Filter in Photoshop
Let’s learn How to use Smart Sharpen filter in Photoshop
- Duplicate your Background Layer (Crtl+J PC) Cmd + J Mac)
- Select the Background Copy layer to work on by selecting it as before
- Convert your Background copy layer into a Smart Object. This will make it easier to adjust later. Go to Layers>Smart Objects>Convert to Smart Object
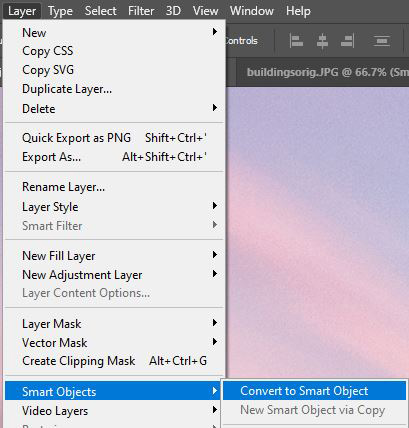
- To confirm your new layer is a Smart Object look in the Layers panel and the thumbnail image of your layer should have a Smart Object icon in it

- With the Background copy layer selected Go to Filters>Sharpen>Smart Sharpen
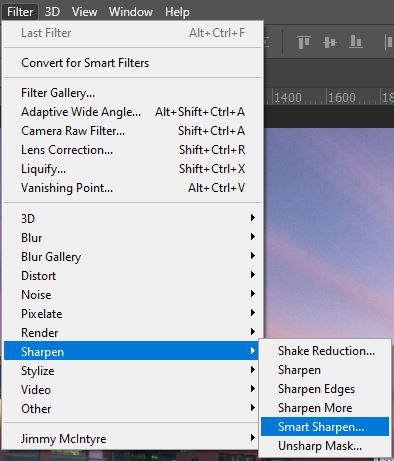
- The Smart Sharpen panel will appear. The panel can be expanded by hovering on the edges until arrows appear.
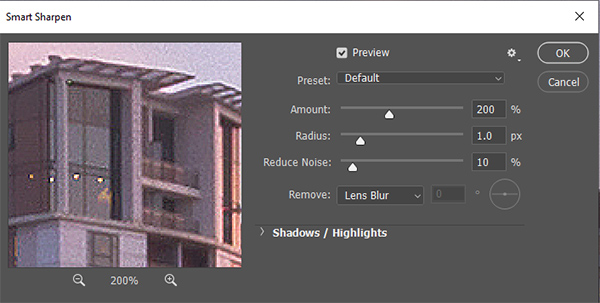
- First, we will look at the Preview tick box. If selected, the changes you make while the panel is open will preview your main image. Toggle this on and off to get a much better view of what is happening to the whole image.
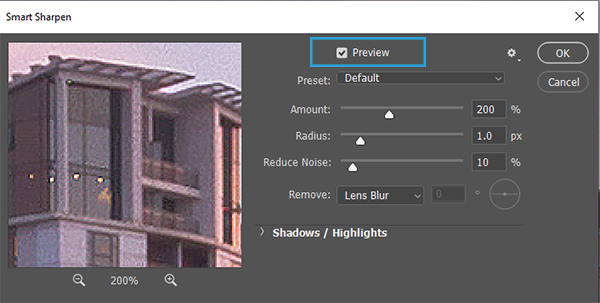
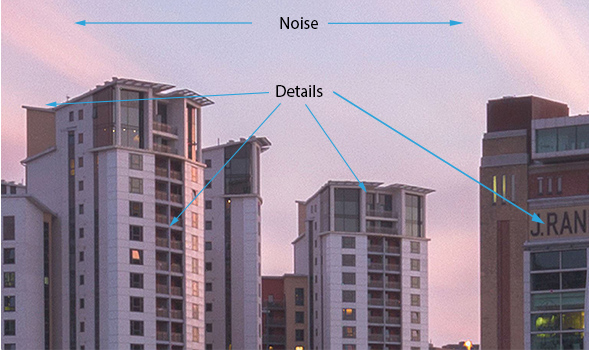
- Let’s look at the sliders within Smart Sharpen. Amount, Radius and Reduce Noise.
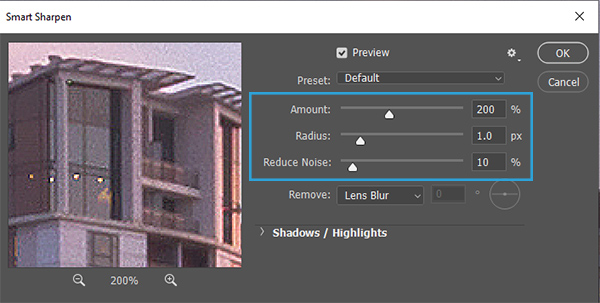
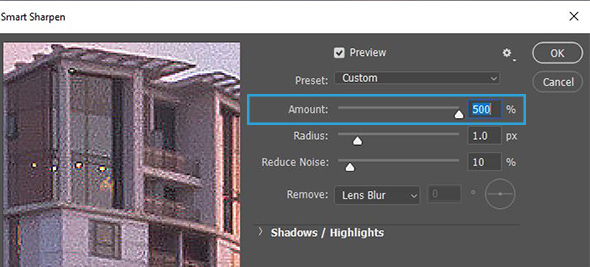
- The Amount is the strength of change. In this image, I have increased the Amount to the maximum so you can see the extreme effect.
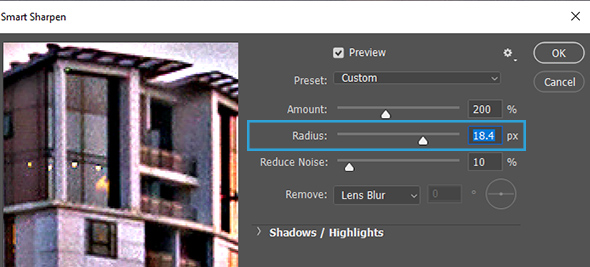
- The Radius controls the thickness in your edges. Again, here is an extreme.
- Reduce Noise does exactly that. It reduces noise and brings back some smoothness.

- Click OK when you’re finished to apply.
- Toggle Layer Visibility on/off to see the before and after
- If you’re not satisfied with your changes, go back and adjust them because we made this layer a Smart Object.
- To re-adjust the settings in Smart Sharpen double-click on where it says Smart Sharpen at the bottom of your Background copy Smart Object layer, and your panel will re-appear to re-adjust.
- Once you are happy with what you have changed click on OK, you can repeat this until you are content with your finished product.
Before And After Smart Sharpen – Original Image on the Left, Smart Sharpen Image on the Right
[compare]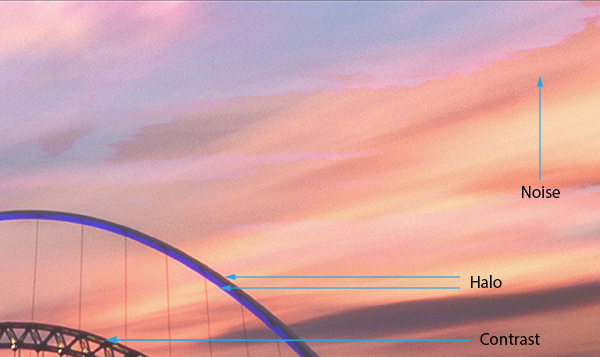
[/compare]
Pros & Cons to using the Smart Sharpen Filter in Photoshop
Pros
Cons
- Non-destructive as a smart object
- Excellent Control
- Work panel can be expanded
- More time consuming/complicated
- Affects areas of an image inconsistently
- Adds Black and white edging if overdone
Enter your email below and join our community of more than 100,000 photographers who receive regular tutorials and have also
Subscribed to our newsletter,
Downloaded our FREE Photoshop Course
Got our FREE Easy Panel for Photoshop
And have our FREE Essential Guide To Luminosity Masks E-Book
Method Four – How to use Unsharp Mask to fix out of focus Photos
Steps For Using Unsharp Mask in Photoshop
- Duplicate your Background Layer (Crtl+J PC) or (Cmd + J Mac)
- Select the Background Copy layer to work on by selecting it as before
- Convert your Background copy layer into a Smart Object Layers>Smart Objects>Convert to Smart Object
- With the Background copy layer selected Go to Filters>Sharpen>Unsharp Mask
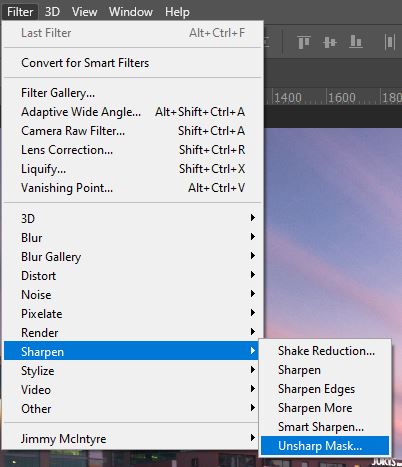
- Unmask Sharp panel will appear, this panel can’t be expanded.
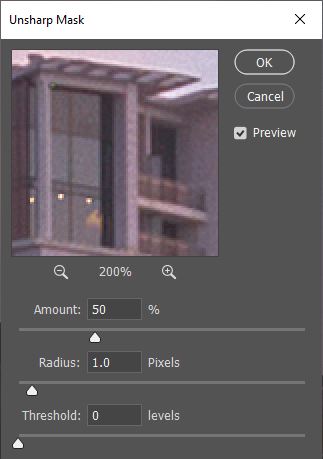
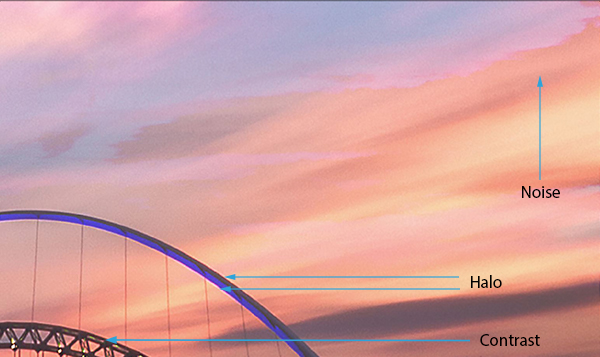
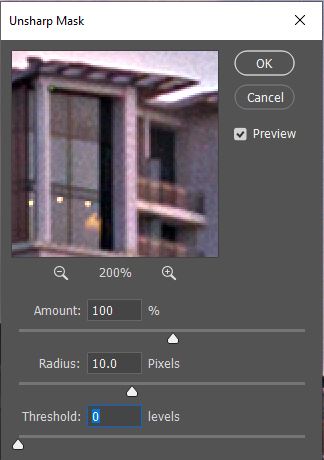
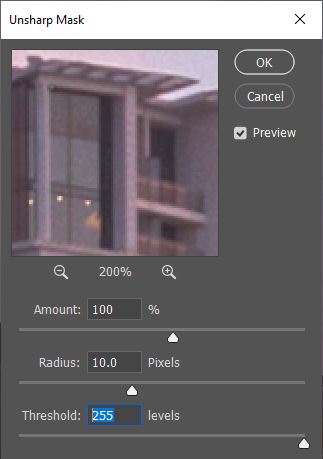
- The Amount and Radius sliders act in the exact same way as they did in the Smart Sharpen tutorial. Let’s look at Threshold.
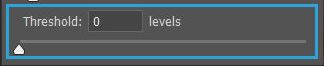
- The Threshold is the colour/tone variation between surrounding pixels that the tool will look for to help define an edge. To show what effect this has on the image look at the two extremes.
- Once you are happy with what you have changed click OK to apply.
- Toggle Layer Visibility on/off to see the before and after
- Remember if you are not entirely happy with your adjustments because you made the layer into a Smart Object you can re-adjust the setting.
Before And After Smart Sharpen – Original Image on the Left, Unsharp Mask Image on the Right
[compare]
[/compare]
Pros & Cons to using the Unsharp Mask Filter in Photoshop
Pros
Cons
- Non-destructive
- Simpler to use than Smart Sharpen
- Can be fine-tuned
- Decent at avoiding excessive noise
- Easy to accidentally make Halos
Thank you for reading this article on More Ways to Sharpen Images in Photoshop Tutorial, Looking for more advanced, cleaner sharpening methods?
Enter your email below and join our community of more than 100,000 photographers who have also
Subscribed to our newsletter.
Downloaded our FREE Photoshop Course.
Got our FREE Easy Panel for Photoshop.
And, have our FREE Essential Guide To Luminosity Masks E-Book.
I’ve created two other methods (actions included) that will help you sharpen your photos much more cleanly than with standard Photoshop sharpening tools. See below for the links.