Instantly Add Punch To Your Images With Soft Light Layers
Instantly Add Punch To Your Images With Soft Light Layers article is by Nick Dautlich, If you would like to write for us, please read here.
If you’ve ever come home from a shoot and been disappointed with the flatness of your raw files, look no further. The soft light blending mode in Photoshop will salvage them quickly. In this article, I’ll show you how to take a zero image to a hero image in no time at all. Read on! to learn how to Instantly Add Punch To Your Images With Soft Light Layers.
[compare]
[/compare]
Why Do Raw Files Sometimes Look Extra Flat?
Sometimes raw files can look extremely flat and lack contrast even if there was decent light when the image was made. Raw files are inherently flatter than JPGs, but could appear even more lacklustre for reasons such as over-exposure or telephoto lens haze. This is where long distances can suck the vividness out of a shot. Preset camera picture profiles or creative styles will also render various default image appearances. I will invariably use neutral as my default setting. It does capture a flatter image, which is an excellent starting point for editing. But it can look super flat in some circumstances. Whatever the reason for a raw file lacking vitality, using a soft light adjustment layer in Photoshop can instantly introduce contrast and saturation as though the image has been dodged and burned. We also use a couple of Raya Pro filters, instantly adding some extra pop.
What Does Soft Light Blending Mode Do?
This quote is from Adobe themselves: ‘Soft Light darkens or lightens the colours, depending on the blend colour. The effect is similar to shining a diffused spotlight on the image. If the blend colour (light source) is lighter than 50% grey, the image is lightened as if it were dodged. If the blend colour is darker than 50% grey, the image is darkened as if it were burned in. Painting with pure black or white produces a distinctly darker or lighter area, but does not result in pure black or white.’
How To Instantly Add Punch To Your Images Use Soft Light Layers
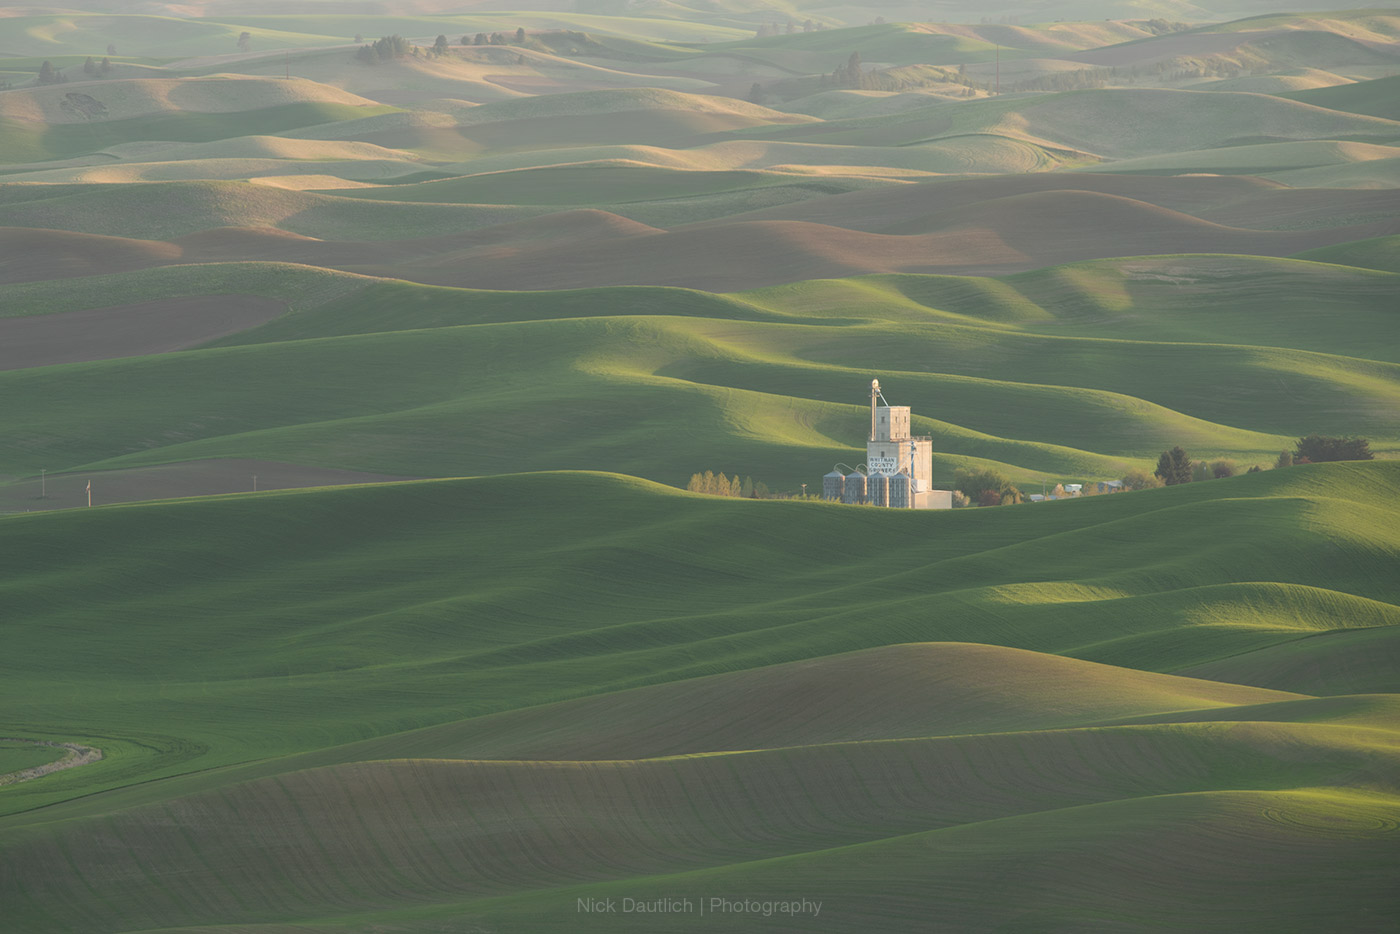
The first image of rolling farm hills in the USA is an excellent example of when we might want to use a soft light technique. Even though the light was perfect when making this image, the results are really flat. There is virtually no contrast and there is no punchiness or saturation.
Let’s fix that using the following quick steps which only take a couple of minutes.
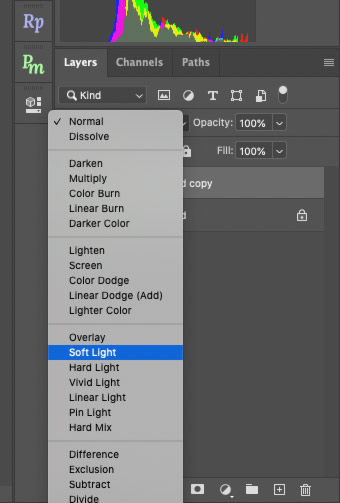
Start by opening the file you want to work on as a new layer in Photoshop. We can ignore all of the raw converter settings for our purposes here. When the layer is open, duplicate it (simply drag it onto the new layer icon). Then click the drop-down menu on the new layer to select Soft Light blending mode.
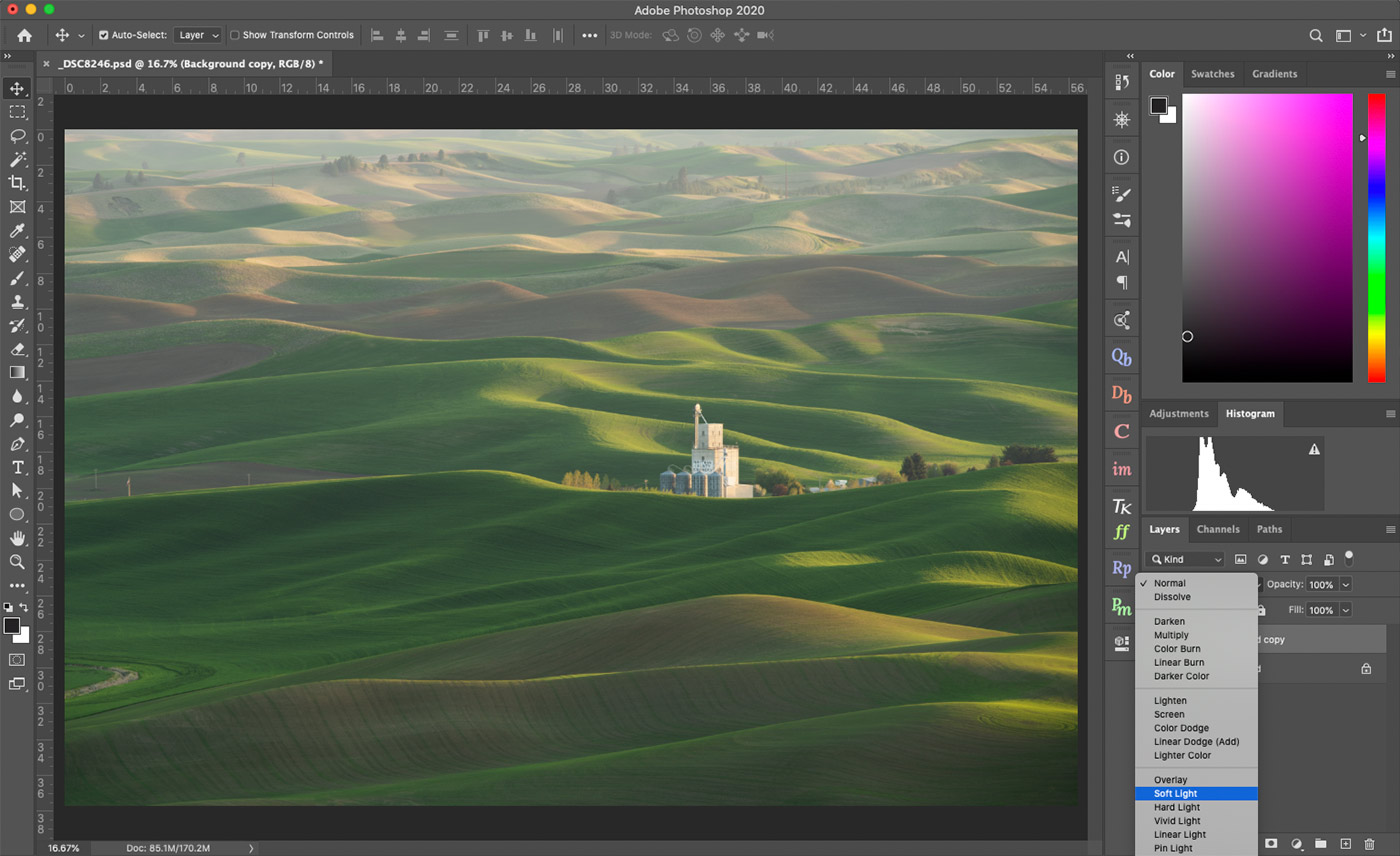
Instantly we see colours pop across the whole image and contrast is introduced as Adobe described. A dodge and burn effect across the highlights and shadows. Sometimes this is all we need to do, so we can save it for the web and head right to our social channel to share it!
Generally, it can be more satisfying to refine an image further with a handful of small adjustments. So in these next steps, I use Raya Pro with its’ powerful ready-made filters. Raya Pro filters can take a variety of images to the next level and include excellent options with different types of adjustments including temperature, glows and effects.
Using Some Raya Pro Filters
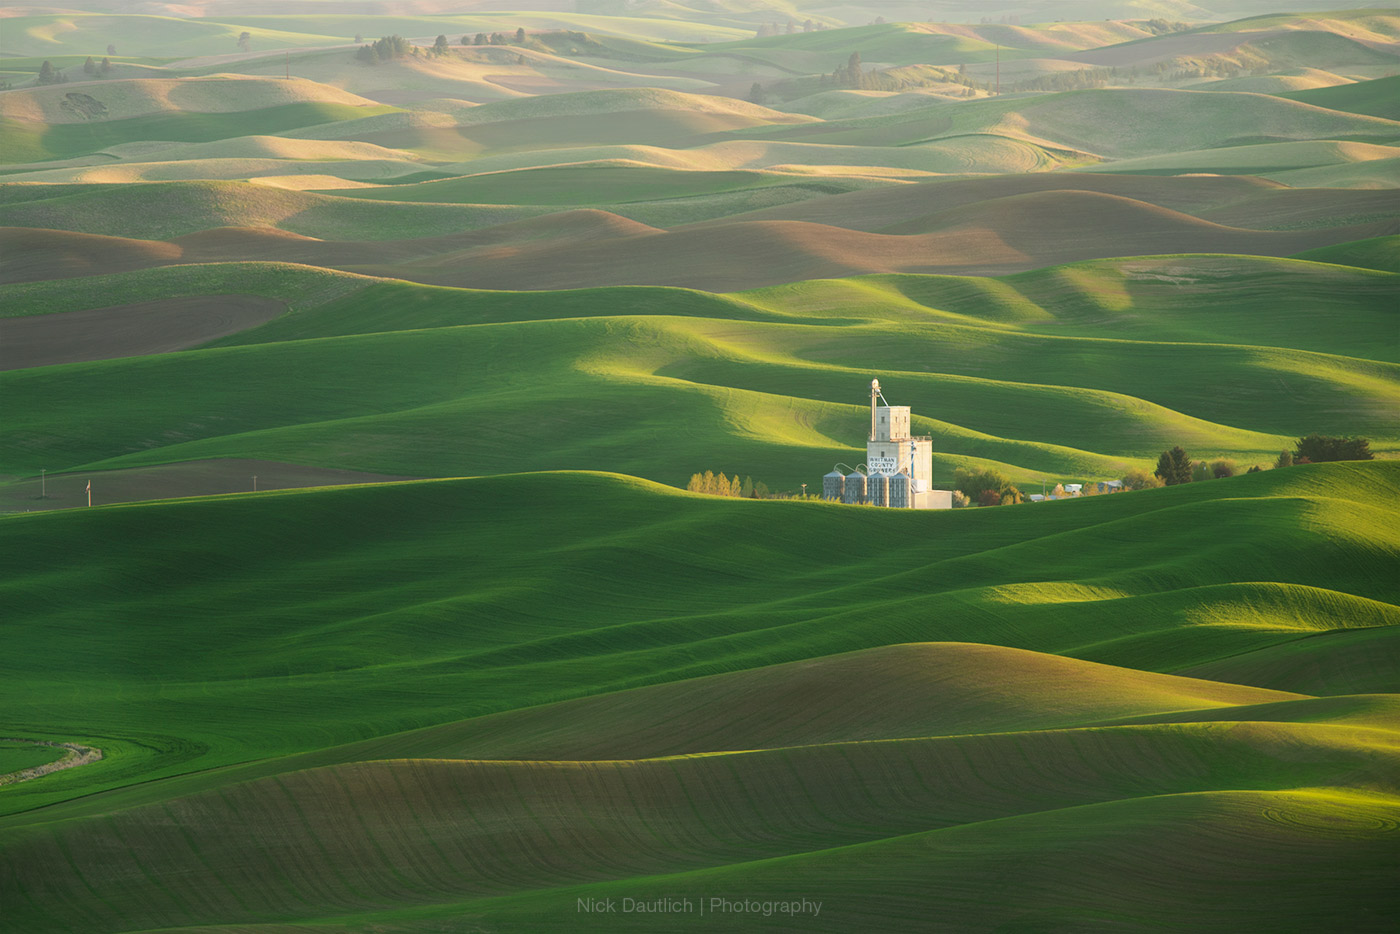
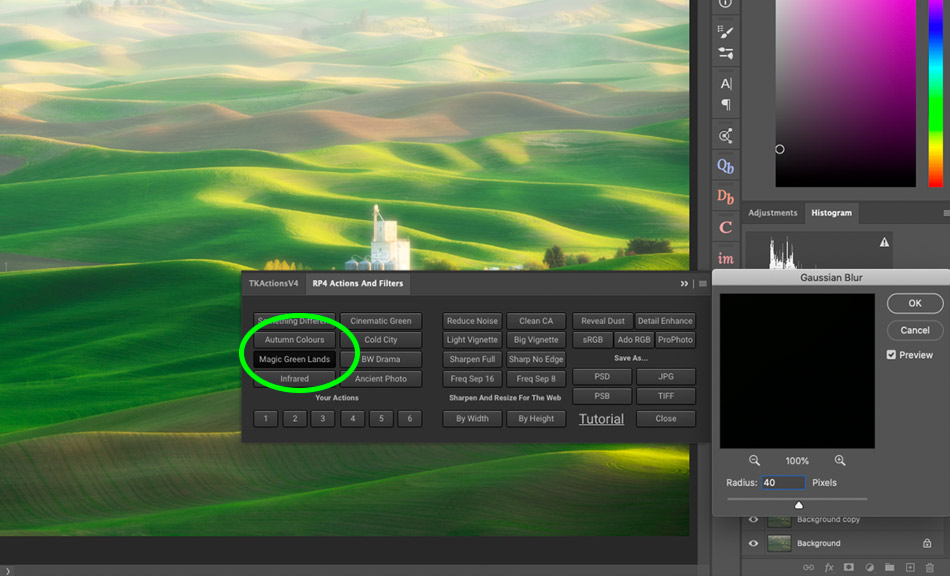
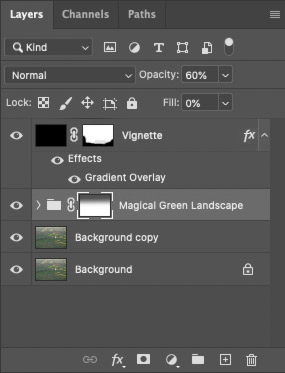
As this image with the fields is predominantly green, we can try the ‘Magic Green Lands’ filter in the actions and filters palette, which will enhance the yellow and green tones considerably. The only user choice we need to make with this filter is the amount of Gaussian Blur to use. I would typically leave the setting around the default ’40’ as it seems to work perfectly. The result is a bit too dramatic so I’ll turn the opacity of this layer down to around 30%. Bingo, we now have more saturation, more varied green tones with brighter highlights and an overall warmer hue which really suits this farmland picture.
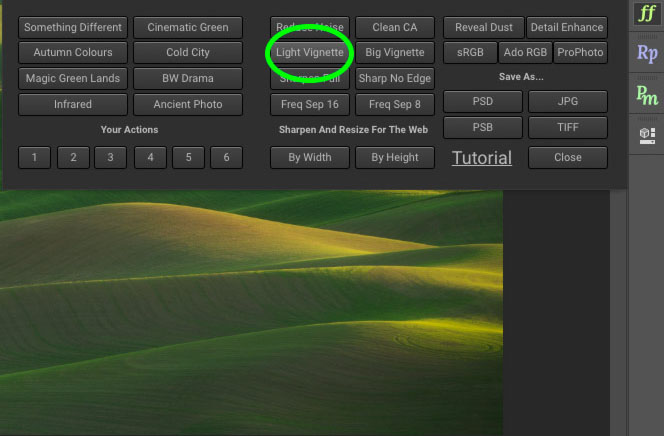
To complete post-processing I use a Light Vignette filter, which is also in Raya Pro. Again the opacity is a bit too high for this image as the corners are already quite dark, so after turning the opacity down to 60%.
I’ll add a layer mask to the vignette layer. Using a layer mask allows me to paint back, or lighten the effect with a large soft brush painted only in the corners. I used nearly 100% opacity in this instance as I wanted to totally remove the vignette from the darker bottom corners. Usually, I’ll paint out a mask with a brush of around 20-30% opacity.

I would personally say this is photograph is now finished. For the purposes of sharing the image on social channels and I only needed to spend around 1 minute processing it in Photoshop. No Lightroom or raw editing required, just soft light and a couple of easy-to-use filters make a striking difference from the starting point.
– Tutorial continued below –
Enter your email below and join our community of more than 100,000 photographers who receive regular tutorials and have also

Subscribed to our newsletter,
Downloaded our FREE Photoshop Course
Got our FREE Easy Panel for Photoshop
And have our FREE Essential Guide To Luminosity Masks E-Book
Another Example To Instantly Add Punch To Your Images
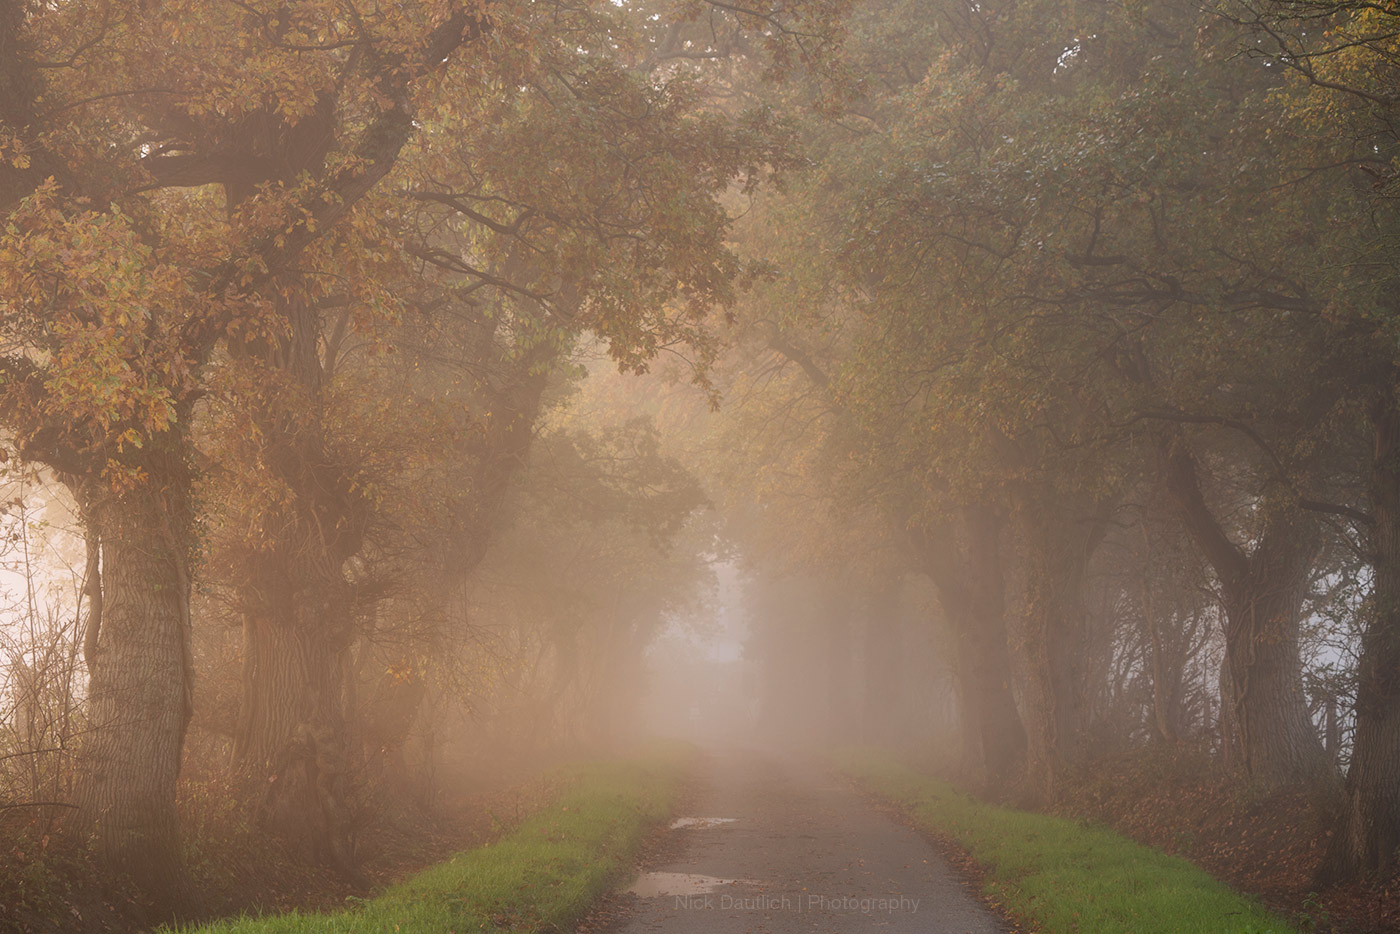
As with most Photoshop processing, we can create local adjustments using layer masks, rather than making universal changes. That’s what we’ll do on the next example. The second image has very little contrast as it was shot on a super misty morning at sunrise. The light was gorgeous but looks too flat straight out of the camera, without enough defining details for my liking.
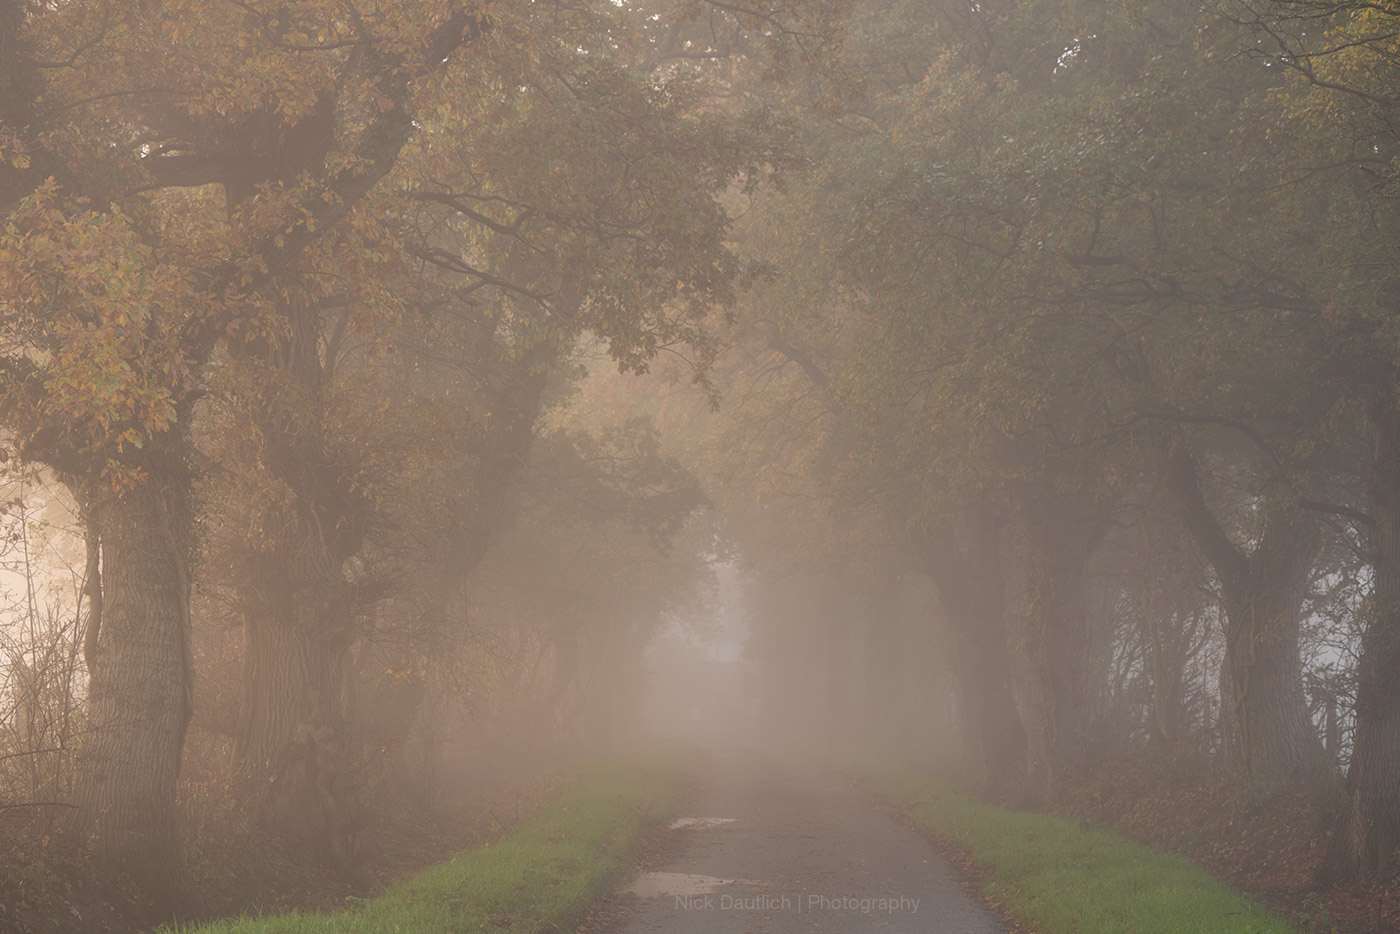
I’ll use exactly the same process as the previous example. Then I’ll create local adjustments for extra contrast and saturation by masking in Raya Pro’s magical green landscape filter to certain areas. I’m hoping this helps to draw in the viewer’s eye, guiding the viewer around the image, as well as enhancing the overall mood.
Painting Local Adjustments
Once again we can ignore all of the raw file settings when opening the file, then duplicate the base layer.
Change the blending mode of the new layer to soft light blend mode and instantly we see improved colours with added universal contrast.
The image does look a little too warm in this instance after the soft light layer. This is probably due to sunrise sidelight hitting the mist whilst reflecting the golden autumn colours, making the whole image too orange. Thankfully I can use Raya Pro’s built-in targeted cooling filter ‘cold highlights’. On this particular image, I set the cold highlights filter layer to around 50% which cools down the highlights perfectly and looks really natural.
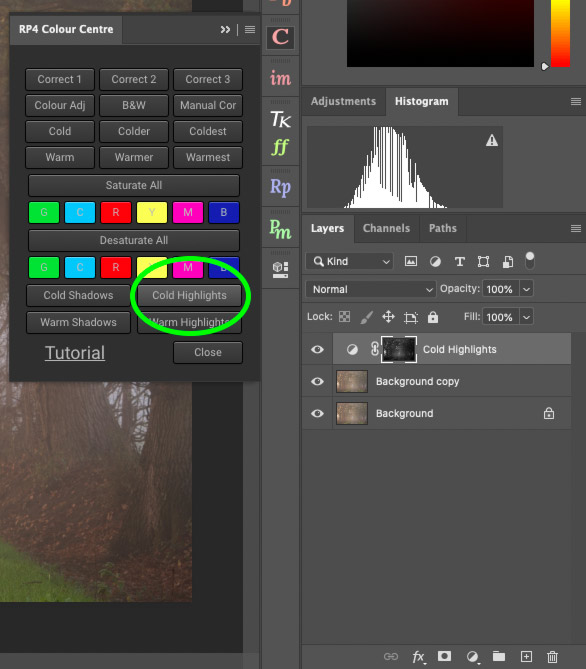
Again using Raya Pro I try out the magical green landscape filter again, which I’m going to mask in locally. As there are virtually no greens in this shot, it will enhance any yellows it finds. So click the magical green landscape filter in the Raya Pro menu as before, then add a mask by clicking the ‘add a layer mask’ icon. If we now invert the mask by clicking on the mask and pressing ‘ctrl+I (PC) or command+I (Mac)’, the mask goes from white (affecting all areas) to black (affecting no areas).
Masking
Grab a large soft paintbrush (I am using around 1000px brush size) with a white foreground and around 25% opacity. Start painting areas of the image you’d like to add back in the filter effect. You can see it adds in saturation and contrast straight away, giving a little more depth to the photo in the areas we paint.

A light vignette from Raya Pro will once again finish off this photograph, just to knock back the edges of the frame. I set this vignette layer to just 23% as that suits the lightness of this misty image, rather than having a heavy vignette.

[compare]
 [/compare]
Summary from Nick Dautlich
There we go, I hope these two demos show just how quickly we can salvage and improve flat images with a soft light layer combined with filters from Raya Pro. I find this technique ideal for turning images around quickly, adding some much-needed punch. Raya Pro is the icing on the cake thanks to a variety of quick and easy filters, instant colour adjustments and many other tricks it provides. Thanks a lot for reading, let me know what you think, if you’ve used soft light and if you have your own super-quick workflow to enhance images.
All images ©Nick Dautlich 2021. Follow along with Nick Dautlich on Instagram here.
Other Ways To Add Punch To Images in Photoshop
5 Ways to Add Punch in Post-Processing
How to Use LAB Color in Photoshop to Add Punch to Your Images
Adding “Punch” to Your Images Using Clarity
Thank you for reading this article on How ToInstantly Add Punch To Your Images, be sure to sign up for our newsletter for more tutorials and great offers.

Enter your email below and join our community of more than 100,000 photographers who have also
Subscribed to our newsletter.
Downloaded our FREE Photoshop Course.
Got our FREE Easy Panel for Photoshop.
And, have our FREE Essential Guide To Luminosity Masks E-Book.
FREE Photoshop Course

The Art Of Photography

Raya Pro for Photoshop
