An Intimate View on Woodland Photography
An Intimate View on Woodland Photography Article is by Sandro Bedin. If you would like to write for us, please read here.
I love travelling to Scotland, and anywhere where there is the sea, mountains and as few people as possible. Also the North West of England, the Lake District National Park, Scotland and North Wales on my agenda. But also countries like Italy, Iceland and Norway, Northern France and Spain are still on my bucket list. What I also like very much are forests, and I find them everywhere. And everyone can find them, usually just a few minutes away from home. I’d like to philosophize a bit about forest photography, or generally something about landscape photography. Let’s start with the forest;
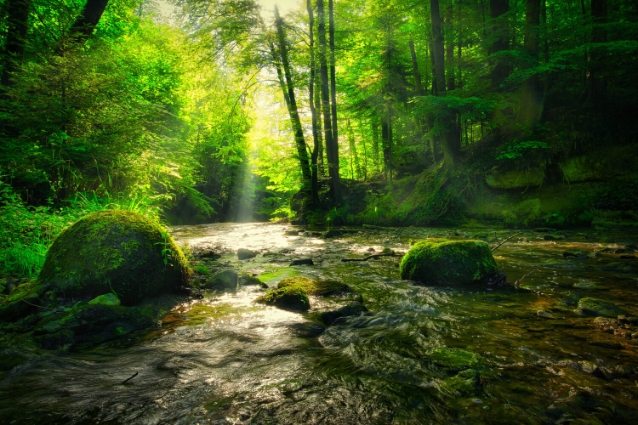
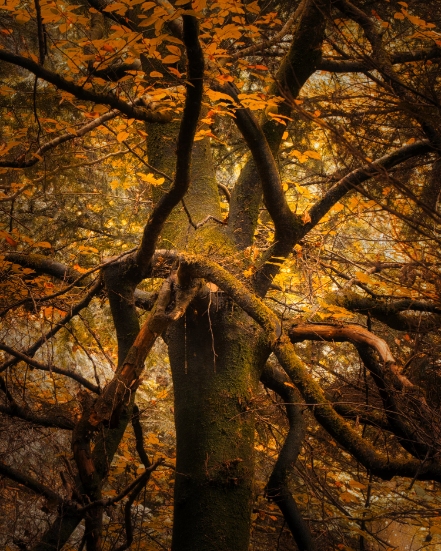
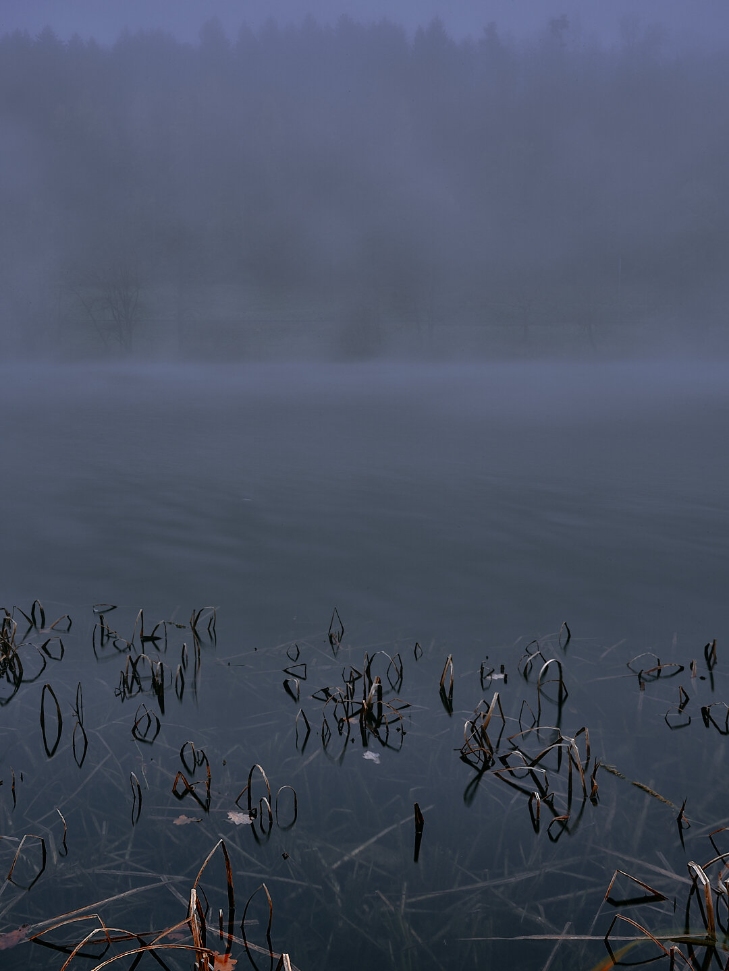
It’s often more difficult to photograph in the forest, the subject is not always recognizable at first glance, and the leading lines and foreground only emerge when you look closely. Capturing the light is incredibly exciting. In the forest, there are rarely huge vistas, spectacular sunsets. It is a cosmos of its own, which opens up to those who allow it.

An Intimate View on Woodland Photography
Before we start, there’s one very important thing we must understand. The forest is a world of its own, which must be entered with the greatest respect. It’s a real symbiosis in the coexistence of plants and animals and for us, a source of peace and oxygen. We need to take this into account every way possible. We also have to protect ourselves, and no matter whether summer or winter, hot or cold, long trousers are obligatory, and also socks with flaps, so that nothing gets on the legs or feet. In Central Europe ticks are very common, the further north, we also have aggressive mosquitoes, further south there are snakes. The worst-case a combination of all these things (oh God).
Headgear is also recommended, as there are also inhabitants in the trees. Your equipment must be in very good condition, but that should be obvious. Before you go, make sure that you have thought of everything.
Planning is actually one of my favourite areas of landscape photography. There is something exciting about planning an adventure and building up that anticipation! Especially now in this time of COVID. I’ve taken a much closer look at my local surroundings. Planning helps with the search for decent locations and can essentially be a great time saver. There’s a level of enjoyment from sitting in my office and planning a photo trip, something incredibly exciting about it – sitting with a glass of wine, scouting out maps and awakening my anticipation of the adventure ahead. It’s important to keep a healthy balance between planned trips and spontaneous adventures. Sometimes I sit down in my camper and drive off, on larger trips I make a precise plan and separate the wheat from the chaff, meaning I focus on the scenic aspects of an area.
– Tutorial continued below –
Enter your email below and join our community of more than 100,000 photographers who receive regular tutorials and have also

Subscribed to our newsletter,
Downloaded our FREE Photoshop Course
Got our FREE Easy Panel for Photoshop
And have our FREE Essential Guide To Luminosity Masks E-Book
Use Topographic Maps For Planning Your Woodland Photography
I grew up in the paper age and physical cards are still very popular. Often order maps of certain areas abroad, to start planning months in advance, research on the internet, stick small pieces of paper and markers on the map, transfer it to a Google map and have the feeling that I know whether I have to go left or right before I arrive. Focus on learning the location as much as possible, especially for woodland. I’m rarely ever in forests at evening times, so the more time I spend getting to know the area before I arrive, the better. The worst thing that can happen is that it gets dark, you don’t know the terrain and your headlamp is not charged. Therefore a tip, make sure you know where you are going and what to expect.
What It Does For Me
When I explore an area, there are a few things that I do. First, try to immerse myself and try to get a “feeling” for the area. Do I find it exciting to even want to photograph it? And what exactly do I want to photograph there. Someone might have a connection to an area, while others don’t, it’s all very personal. Secondly, and this is a little more practical, I like to use my phone as a camera. For me, this is mainly a “mindset” approach – it makes everything feel much more relaxed and calm; I don’t think about tripods, filters, manual settings or even my photo bag – I can really concentrate on the composition.
Arrival on site
The advantage of having something planned, you have much more peace and quiet. I would like to share my personal approach with you – Put your equipment down. Evaluate the place with your senses. That way you can really connect with your surroundings and arrive at a relaxed way of thinking, which ultimately benefits your creativity.
When I’m on the road with the camper, I make myself a good breakfast, and if not, I’m sure I have my thermos with coffee with me. It’s really important to note that I don’t really think about photography at this early stage – I just allow myself to slowly understand what I really like about the place. In my opinion, this approach is fundamental to discovering a composition. It is also important to arrive early, feel the forest. Sit down and let everything take effect on you. Look around you.
Let’s start by taking a closer look at what we actually want to photograph. This is about narrowing down the search area. Is there anything in the place that you really want to photograph? If you are already discovering patterns, if you see exciting things even a little further away, there are details that fascinate you. Can you already discover patterns or does a composition stand out?
Making It Up As You Go
What if I have no particular theme planned? What if I am on-site for the first time and I have not planned anything at all? This is a situation that you will probably encounter more often. You don’t always know what you want to photograph before you arrive – landscape photography would not be so exciting if we always had a good idea of what to expect. But the approach remains the same. After you have got a feeling for the area and perhaps explored it with a bit of an open mind, you ask yourself the same question. Is there something here that I really want to have in my composition(s)…we just have to find out what we actually find attractive enough to photograph here.
As already mentioned, a big part of composition is to find something you want to include in your photo. Think about how many possible interesting subjects are around you. Have you managed to find at least one interesting object? This is a crucial moment in composing a photograph, and it is here that we begin to think about the composition more physically and ask ourselves the crucial question:
Where Do I Want To Position My Subject(s) Within The Frame?
There are more elements to consider in landscape before we can decide where to place our subject in order to get an intimate view on woodland photography. Light, frame and balance, to name but a few. Now, you can get your camera out of your pocket. I hope you’ve got an understanding so far on the way that I prepare for a shoot, and what I’m doing. If you have made it this far, congratulations. Maybe you are now thinking about your motivation in photography. It isin’t easy to put this on paper.
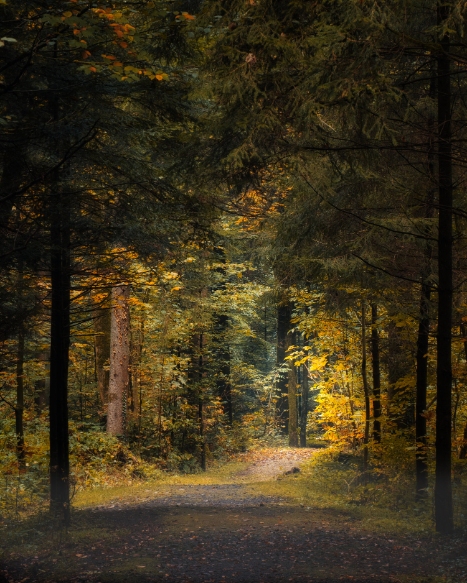
I assume that you have arrived at your place and found your main subject. Most likely it is an object or a feature at a certain distance. But always ask yourself how you can integrate the foreground as well. Is there a great shrub, a stone or a wooden stick that makes first contact in the picture?

A short, but intensive leading line from the foreground to the centre of the picture without a particularly accentuated foreground
Can I be guided from this to the main point? Walk around and see how the light comes in? If you have too little light, the best you can do is create artificial light (torches, lamps, etc.).
Choose the appropriate focal length with which you want to take the photo. I always recommend taking photos close to the ground, especially in the forest. Do it in such a way that you are just above the bushes unless they are very interesting. Also note how the light falls, especially in the forest it is especially nice to photograph the structures of backlit leaves and ferns. So, now we know what we want to photograph. Let’s start with the construction of our composition. I like to use the term ‘construct’. I think it is a fantastic way of looking at the composition as a whole – it is many small things done on purpose and brought together to form the final product (our photo).
Interest in the foreground can be a very influential part of this building process and can serve different purposes – and in many cases, an interesting foreground can be the difference between a well-thought-out composition or just a quick snapshot of an interesting subject.
KISS the Composition (Keep It Super Simple)
For me, coming from street photography it is still the same, I keep it very simple. Don’t over construct the image,
- Try to show a certain emotion with your photo
- Attempt to incorporate several elements that make a particular place unique
- Just try to create a pleasant “visual flow” through your image
Whatever your considerations may be, there are some generally accepted techniques for actually “constructing” your photography.
Always remember: an interesting subject is no guarantee of good composition – and bad composition can ruin an interesting subject. Composition is essential when it comes to creating a visually appealing photograph. A scene may look attractive to the eye, but it is incredibly difficult to bring the beauty of real-life into photographic form. Composition allows us to tell the story of a place and show how we felt there – it’s a well-thought-out photo, not just a quick snapshot.

How much emphasis should be put on the foreground in a composition to create an intimate view on woodland photography? The meaning of the foreground is subjective and it’s something you can be creative with. If you really want to – it can be the most important part of your composition. For example, if you have a wide-angle lens, a great technique is to get close to something on the floor to bring out its perspective and give it a much stronger impact within your composition. When you hold your camera in your hand, it’s a good exercise to experiment with different perspectives and really see how very small movements can change your image as a whole – it’s really up to you as a photographer to decide how much emphasis you want to put on any foreground elements. This helps us to expand the history of the landscape.

The Choice Of Focal Length And How A Tele Is A Must In Woodland Photography
At the time of writing, my four lenses are a 10-24 mm, an 18-55 mm, a 16 mm and a 55-200 mm. You can see that these lenses give me a “focal length range” from 10 mm to 200 mm. This gives me a lot of choices when I am on location. I can fill in my image area with 10 mm ultra-wide, or I can take extremely specific photos with 200 mm and remove superfluous elements from my photo.
You can only get such details with a telephoto lens
I have grown fond of these lenses and they offer me an enormous variety in the composition of my pictures. It is nice to know that I have no excuse in terms of focal length!
My recommendation would be to start with something similar. Depending on the camera model a 16-35mm, or 18-55mm is still a versatile focal length range between wide-angle and telephoto. What I definitely do not recommend is to start with an 18-200mm for reasons of cost. Most of the time these lenses are big, heavy and not very good. There are certainly exceptions, but they come at a high price. Do I have to invest in these lenses to achieve compositional success? In short, yes and no. You have to find a good mixture. These lenses are tools that will make your work easier (and possibly save you some extra walking), but I have spent many years with my Leica Q and only one lens: my one 28mm, which I absolutely loved and still love. With this camera, I can compose incredible portfolios, especially in cities.
Why A Long Lens In The Forest or For Landscape Photography?
Wide-angle lenses can play a big role if we’re trying to get an intimate view on woodland photography. For many landscape photographers, it will be their main lens. But imagine you’re out and about, taking pictures with the wide-angle only, and by the fifth picture at the latest, it gets boring. I love to shoot in woodlands also with the tele. This can be seen in two main ways. Firstly, the telephoto lens can be used to focus on subjects that are sometimes miles away and really eliminate everything else in the surroundings that could be just a distraction. Secondly, they can create what is known as a “compression effect”. Distant subjects can be effectively “brought closer” to you, making them appear larger and more prominent.
I hope you were able to follow my train of thought and got a taste for taking pictures of your surroundings with a slightly different perspective. I am sure you will discover a lot.
To Summarise An Intimate View on Woodland Photography
- Respect our Forests and Woodland.
- Keep yourself well-protected.
- Learn the land in advance.
- Feel the terrain and surroundings.
- Find an interesting subject.
- Take time to build a good composition.
- Don’t over-complicate things.
- Use an array of lenses with a large range of focal lengths.

About Sandro Bedin
My name is Sandro and I live in Lucerne in Switzerland. I have been taking pictures since I was a child and today I am 55 years old. On many journeys in my younger years I made countless slides, developed and enlarged them myself in colour and black and white. Then came the family and for a long time the camera stayed down.
The interest came back in the last years. For a long time, I was mainly interested in street photography and I studied intensively photographers like Henri Carter Bresson, Garry Winogrand and many others.
The trigger for me to take a closer look at landscape photography was an exhibition of GENESIS of Salgado. His picture style is indescribably intense and intimate. Through him, I came across Ansel Adams and his inimitable style of photography. At that time I was very busy at work and things were not going very well. I had an enormous need for relaxation and booked my first Scotland holiday. Photography was not the main thing, but primarily the need to switch off.
But the landscapes that awaited me were quite overwhelming. When I came back, I had found my passion and I started to search for information. This was just two years ago. And so found People like Nigel Adams and Mads Iversen, Albert Dros and Isabella Tabacchi, Max Rive and many more as Inspiration and of course Jimmy McIntyre and his fabulous Training and Tools.
Mainwebsite:
www.sandrobedin.com
Imagesite:
https://sandrobedin.smugmug.com/
Instagram
@ sandro_bedin_photography
Thank you for reading this article on An Intimate View on Woodland Photography, be sure to sign up for our newsletter for more tutorials and great offers.

Enter your email below and join our community of more than 100,000 photographers who have also
Subscribed to our newsletter.
Downloaded our FREE Photoshop Course.
Got our FREE Easy Panel for Photoshop.
And, have our FREE Essential Guide To Luminosity Masks E-Book.
FREE Photoshop Course

The Art Of Photography

Raya Pro for Photoshop
