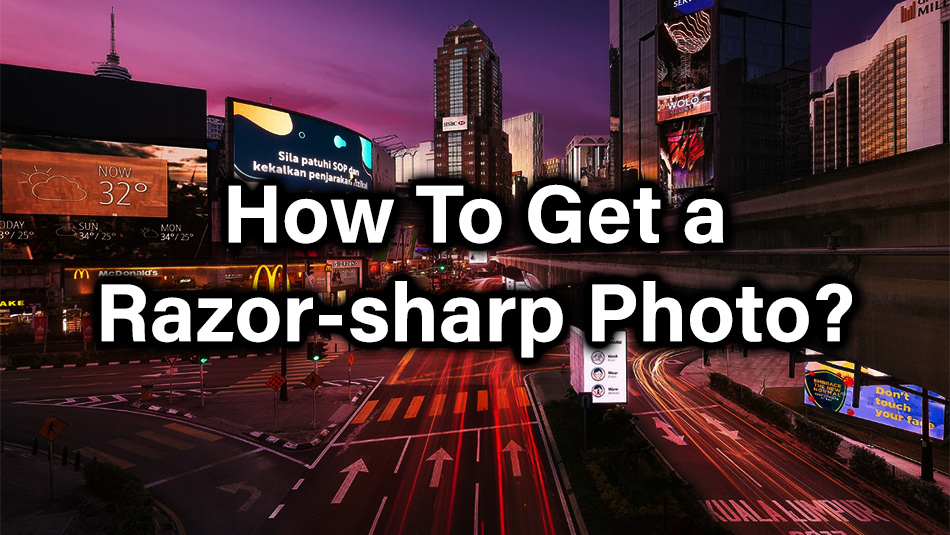
How to get a razor sharp photo?
How to get a razor sharp photo? The article is by Grey Chow, If you would like to write for us, please read here.
Do you often feel that your photo is not sharp enough? If yes, here’re some tips on How to get a razor sharp photo?
Capturing a sharp photo is crucial. If your photo is not correctly focused, the photo will look “soft”. At the worst case, you may not be able to fix the photo with any photo editing software but to discard it.
Because of that, I always remind my fellow photographers to check their focusing each time during a photo shooting.
Once you get the best sharpness right out from your camera, then you can further sharpen your photo in post-processing to produce a razor-sharp result.
Without wasting any more time, we will start with the camera settings and focusing. After that, I will share a few tricks on how to sharpen your photo.
1. Using f/8 or f/11 for greater depth of field
For Landscape photography, not only do we want to capture a sharp photo, but we also want to ensure consistent sharpness from centre to corner. Because of that, we recommend using f-number at f/8 or f/11, which will produce a deeper depth of field that ensure everything in the frame is in focused. Lower than that, you will have a shallower depth of field, which certain areas will be in-focused and certain areas will look soft.
If you go for higher f-number such as f/16 or f/22, the overall sharpness of the image may drop due to lens diffraction effect. So, to have the best sharpness and deeper depth of field, f/8 or f/11 would be the best choices. This is also why landscape photographers often describe these two f-numbers as the “sweet spot” for a wide-angle lens.
2. Manual focus to have a consistent focus
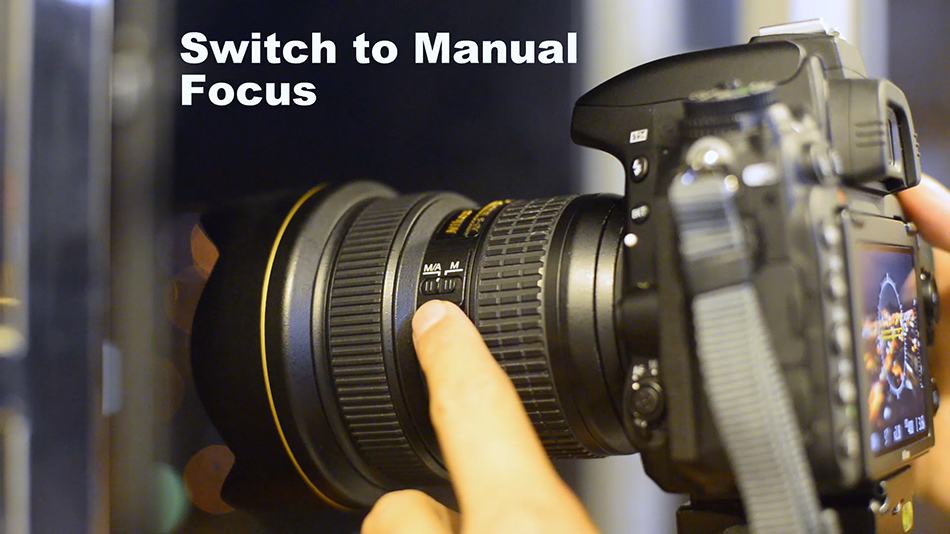
To get the most out from your camera, I suggest using Manual Focus. Auto Focus may work well when there’s enough light for the camera to “see” the scene, but for Landscape Photography, we often start shooting before the sunrise or in the middle of the night. Because of that, Auto Focus may go wrong, and we wouldn’t want that to happen.
On top of that, Manual Focus also provides a consistent result across every photo that you take during a photo shooting, because the camera won’t try to re-focus every time you press the shutter button. You can still use Auto Focus to focus on your subject if you prefer to stick with that. After focusing, you can switch the focus to Manual Mode to keep the focus fixed.
To perform manual focusing, use the camera Live View, zoom in to a spot that you want to focus on, turn the focusing ring on the lens until everything appeared sharp on the screen.
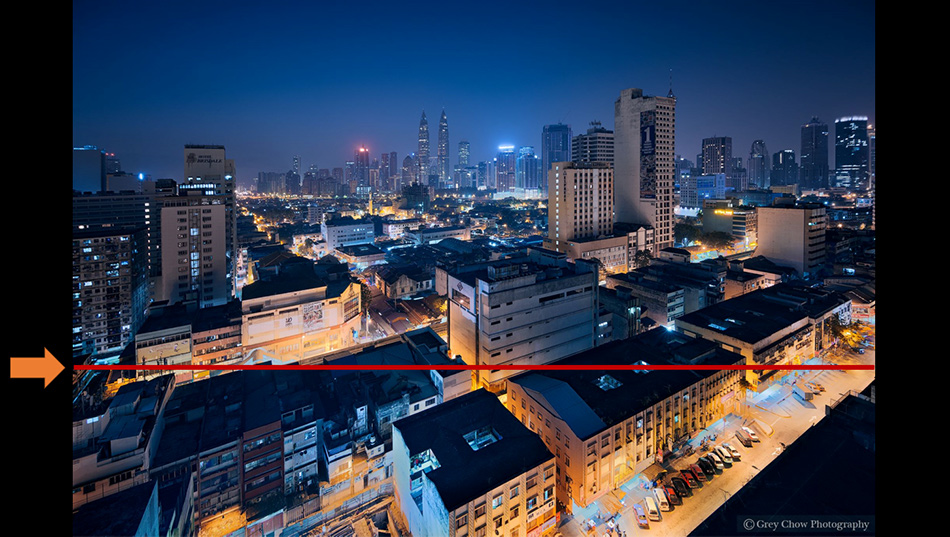
3. Focus at one third into the scene
Infinity focus is a state where you have everything on your frame in focus, even an object at an infinite distance away. This is important because even if you are using f/8 or f/11 and have a good depth of field, but you focus at a wrong spot, the depth of field will not be able to cover everything on your frame, certain areas of the photo will look soft. The simplest method to achieve infinity focus is to focus on a point one-third distance from the bottom of the frame, and then you will have everything perfectly sharp.
Using the below photo as an example, you can set your focus on any subject that’s on the red line.
Alternatively, you can set your focus by pointing to the infinity focus icon on your lens, but sometimes, the lens may not be precisely calibrated. It is always important to review your photo sharpness and make any necessary adjustment.
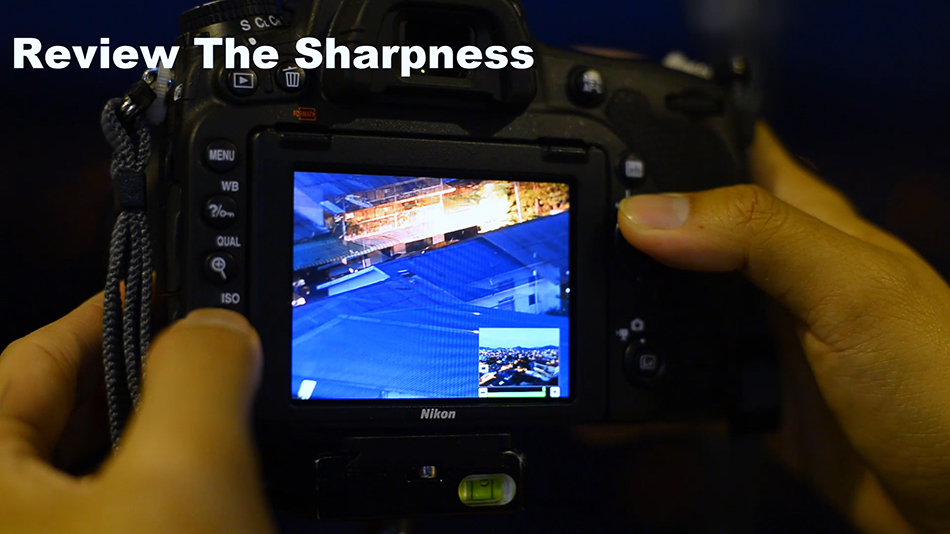
4. Review the sharpness
I have mentioned this at the beginning of this article, but I couldn’t help to repeat it. Always review the sharpness of your photo during the shooting. To review the sharpness, you can use your camera Live View, zoom in on a captured photo, ensure that the sharpness is there from the centre to the corner of the frame.
5. How to get a razor-sharp photo in Post-processing
Now, you have got the best sharpness from your camera, the next thing to do is to sharpen your photos in post-processing further. Generally, there are three types of sharpening for photography, Capture Sharpening, Local Sharpening and Output Sharpening. Let’s go through all of them one by one.
5.1. Capture sharpening
Also known as Deconvolution sharpening. It is the first sharpening you are going to apply to your photos during post-processing.
The purpose of the Capture sharpening is to offset the lack of sharpness in the RAW photo that caused by our camera gears, which can because of the lenses quality, or anti-aliasing filter and demosaicing process.
You can use any sharpening methods that you know to perform capture sharpening, and the idea is to apply an overall sharpening to the photo. It lays the groundwork for a more extensive sharpening later.
My personal preference is using Texture slider from Adobe Lightroom, which helps to enhance the small details of the photo. It gives a more subtle result and less affecting the contrast of the photo compared to the Clarity slider.
Sometimes I may also add a bit of clarity to the photo. Clarity focuses more on larger detail of the photo, but if you overdo it, it will produce an unwanted halo around the edges, more contrast and washes out some colours on your photo.
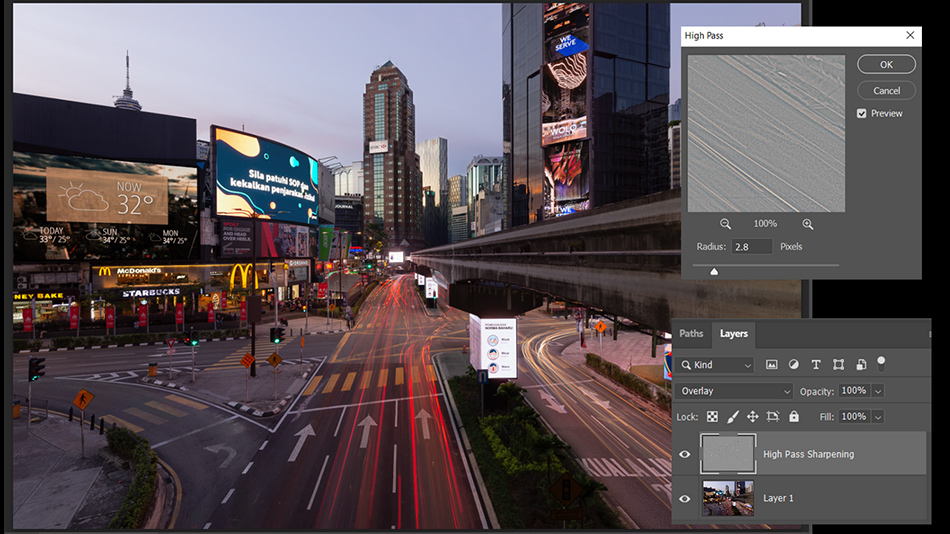
Alternatively, you can also consider using High Pass sharpening method on Photoshop.
To perform High Pass sharpening, you need to first duplicate your image layer on Photoshop.
With the new image layer selected, go to Filter > Other > High Pass, and then key in a value for the radius and click OK. I suggest using 2.8 Pixels, but depending on the photo size, you may go for a higher value.
After that, change the Blend Mode to Overlay for that image layer.
5.2. Local sharpening
Also known as creative sharpening. Unlike capture sharpening that sharpens the whole photo, local sharpening only focuses on a specific area/object on the photo.
Local sharpening is further to increase the clarity of an important area/object to make it stand out more from the frame. You can also choose to reduce the sharpness in a certain area to create a better sense of depth by having a transition from soft to the sharp.
5.3. Output sharpening
Output sharpening is the final adjustment you make before you want to export your photo for printing or web.
Usually, you already have a specific output size in mind, so you will first resize your photo to a particular resolution size.
Then, only you apply the output sharpening to the whole photo. The purpose is to optimize the sharpening result based on a specific file size.
Summary from Grey Chow Photography
So, that’s all for this article. I hope this will give you all a better idea of how to create a razor-sharp photo. 😊
Grey is an award-winning travel photographer based in Kuala Lumpur, Malaysia. Passionate in Nature Landscape and Astronomy photography. Be sure to check out his website and Facebook page.
Happy shooting!
Other Sharpening Articles
Advanced Post-Processing Tips: Three-Step Sharpening
Image Sharpening With Adobe CC
Take Control Sharpening in Photoshop
The Three Levels of Sharpening You Should be Applying in Photoshop – Detail, Global, Local
FREE Photoshop Course

The Art Of Photography

Raya Pro

Thank you for reading this article, be sure to sign up for our newsletter for more tutorials and great offers.

Enter your email below and join our community of more than 100,000 photographers who have
- Subscribed to our newsletter.
- Downloaded our FREE Photoshop Course.
- Use our FREE Easy panel in Photoshop.