How To Photograph Star Trails
How To Photograph Star Trails article is by Grey Chow, If you would like to write for us, please read here.
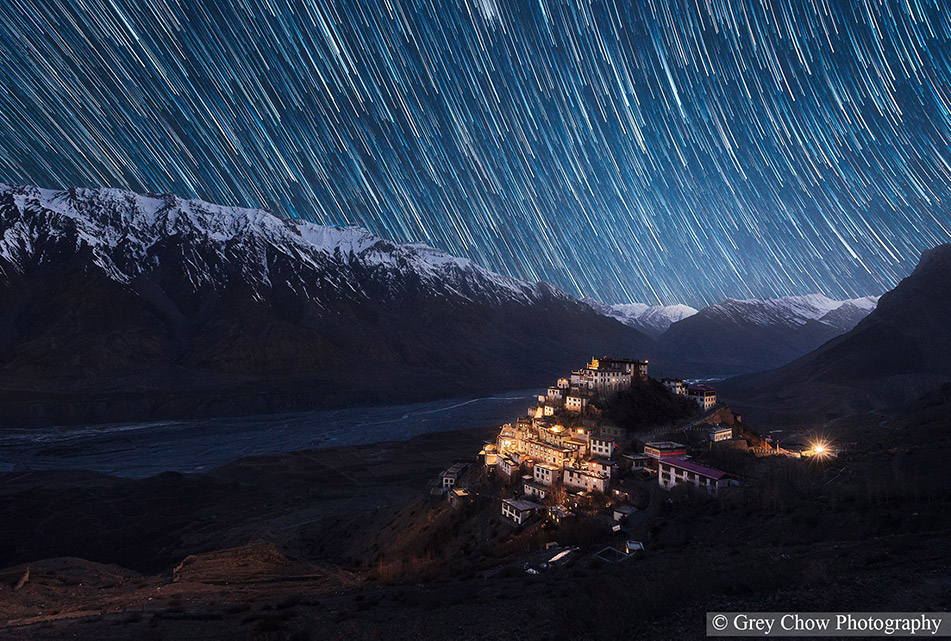
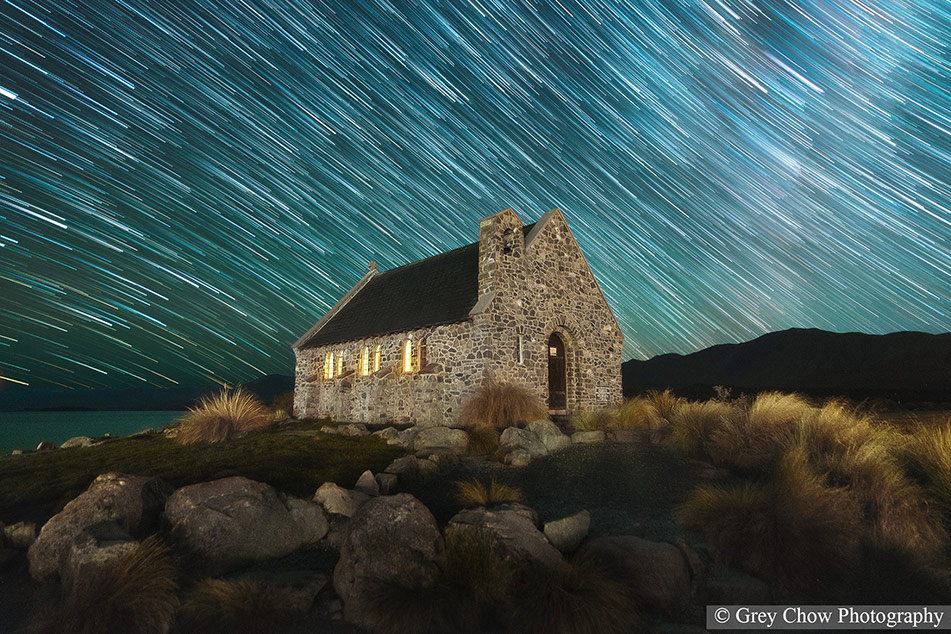
Besides photographing the Milky Way, Star trails are another thing you should put on your list for Astrophotography. Here, I’m going to share with you how to plan and capture star trails. We’ll cover everything from Camera Equipment and Intervelometers to planning and processing. This will include a beginners tutorial for using StarStax Software.
1. Camera Equipment
Let’s start with the camera equipment first. Here is the list of the equipment you will need to photograph the star trails.
- Tripod: A sturdy tripod that won’t easily shake under windy weather.
- Camera: Any camera with a Manual Mode function would suit the job.
- Lens: I recommend using an Ultra Wide Angle Lens, and if it is possible, choose the one with the Aperture at f/2.8 or wider. Using such “fast” lens would give you a better exposure in a low light environment without using a very high ISO.
- Intervalometer: This is essential for photographing the star trails. You will need to take multiple shots and merge them into a single image later. An intervalometer will automate the shooting process. Some cameras have a built-in intervalometer function. You can check your user manual on how to configure it.
2. Find a Dark Sky Site
Like photographing the Milky Way, we prefer to take photos at a location with lesser light pollution. There are many Light Pollution Map sites can be used to find a suitable location. Usually, I use Darksite Finder (https://darksitefinder.com/map/).
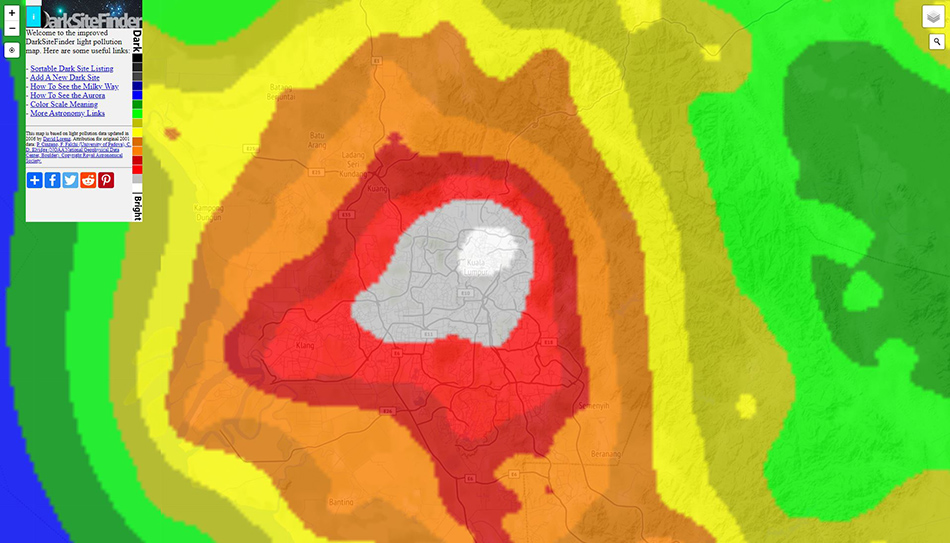
Any area labelled with green, blue, and black has minor/zero light pollution and is suitable for night sky photography.
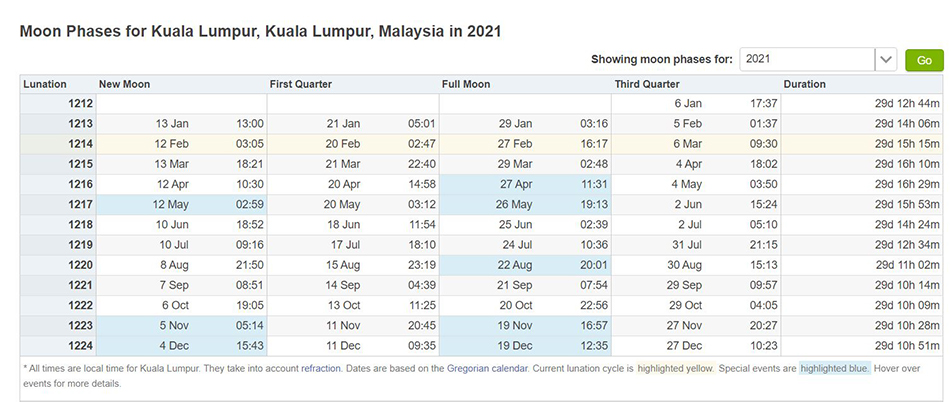
3. Check out the moon phase
To keep thing simple, I suggest taking photos during the new moon and avoiding full moon. This because strong moonlight can wash away most of the stars. You can check out the moon phases and plan your shooting by referring to the following site.
https://www.timeanddate.com/moon/phases/
– Tutorial continued below –
Enter your email below and join our community of more than 100,000 photographers who receive regular tutorials and have also

Subscribed to our newsletter,
Downloaded our FREE Photoshop Course
Got our FREE Easy Panel for Photoshop
And have our FREE Essential Guide To Luminosity Masks E-Book
How To Photograph Star Trails – Prepare Your Camera Before The Shooting
Before the shooting, let’s configure your camera settings based on the following suggestion. I will also explain why.
Shooting Mode: Manual
You will photograph in an extremely low-light environment. Most likely, your camera won’t be able to determine the camera settings correctly by itself, regardless of whether you are using Auto, Aperture Priority, Shutter Priority, or Program mode. So, it is recommended to use Manual mode here.
If you have never taken photos using Manual mode before, rest assured, I’m going to share how to decide your camera settings step by step later.
Image format: RAW format
You may have already known that a RAW file gives you a better adjustable range than a JPEG file. Thus, it is best to capture as much detail as possible during the shooting and recover the shadow/highlight during the post-processing.
White Balance: Auto
Here’s another reason why I want you to shoot in RAW, you can easily correct the White Balance during post-processing. Use Auto White Balance setting so that you have less configuration to bother during the shooting.
Focus mode: Manual
It is hard for your camera to auto-focus correctly in the dark, and you wouldn’t want to end up with out-of-focus photos. Set your focus mode to Manual, and later I will share with you how to manual focus in the dark.
Metering mode: Matrix/Evaluative Metering
Actually, it doesn’t matter what metering mode are you using here. Your camera won’t be able to meter the light correctly, and the best practice is always to capture a test shot and adjust the setting accordingly. You can use the default option, which is Matrix/Evaluative Metering.
Long Exposure Noise Reduction setting –Off
It is better to perform the Noise Reduction later during the Post-processing. There are many other options, and the result is better too. On top of that, the Long Exposure Noise Reduction setting will also double up the shooting time.
Instead of spending the extra time on Noise Reduction, I suggest capturing as many photos as possible during the shooting and reduce the noise later.
Decide Your Camera Setting
Finally, it is time to talk about the camera setting. Using the following process, we will start with the Aperture.
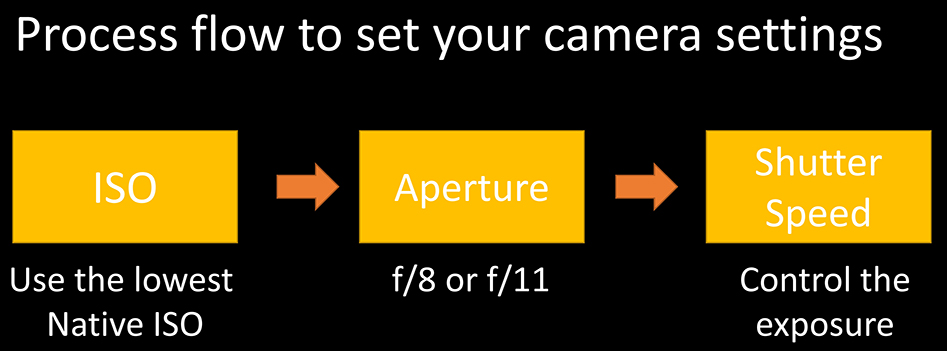
Aperture – use the widest aperture (lowest f-number)
To keep thing simple, if you are using a 14-24mm lens with f/2.8 Aperture, use f/2.8. If your lens can only go up to f/3.5, use f/3.5. Use the widest option that you have.
Shutter Speed –set to 25 seconds
Technically, you can go as long Shutter Speed as you like for photographing star trails. You can even capture a photo with 45 minutes of exposure in one single shot, but I wouldn’t recommend you do that. Your camera sensor may get damaged due to overheating. Let’s set 25 seconds for now.
ISO – use this to control your exposure
Now, you have the Aperture and Shutter Speed fixed. The only option you have to control your exposure is ISO. You can start with any ISO setting to take a test shot, for example, ISO 4,000. Then, review the result and finetune the exposure by increasing or decreasing ISO.
Focusing
Now, you have set your camera settings, next is to set the focus. Here are some of the methods you can use.
Infinity Focus
This is the easiest method to set the camera focus. If your lens has the “∞” infinity mark on it, point the focusing ring to this “∞” will achieve infinity focus and provide perfect sharpness.
However, this doesn’t mean all the lens would be able to achieve infinity focus when pointing at the “∞” mark. Most of the lenses only mark approximated infinity focus, so it is best to verify the focus and adjust the focusing to ensure the focus is correct.
Focus on the star
The second method you can try is to focus on the star using your camera’s Live View. (if your camera’s Live View has Exposure Simulation)
You need to turn on your camera Live View, zoom in at 100% (or as far as needed). Then, using the multi-selector button to move around the “zoom box” and look for a star that’s bright enough to be seen on your camera’s Live View.
Now, with the star showing on your screen, turning the Focusing Ring on your lens until the star is in-focus and looked sharp. Lastly, zoom out back to original size and start taking photos.
Set Up Intervalometer And Start Shooting
Once you got the right camera settings, you can set up the intervalometer. Although you can take the photo of star trails in a single shot, I don’t recommend that this may damage your camera sensor when it got heat up. We are talking about long exposure for at least 30 minutes here.
To set up the intervalometer to take multiple shots, you need to know your Shutter Speed first. For this case, it is 25 seconds.
Then, you add buffer time for the camera to have enough time to write the photo into the memory card. Depending on how fast your memory card’s writing speed, the buffer time can vary from 3 to 5 seconds. For a first-timer, you can try using 5 seconds, which should be more than enough for most cases.
For the intervalometer, you set the interval based on the total Shutter Speed plus buffer time, which is 30 seconds. At every 30 seconds, the intervalometer will trigger the camera to take a photo.
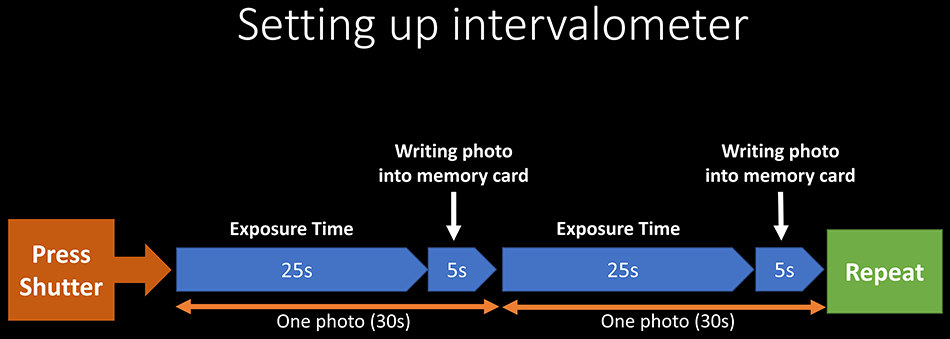
Lastly, the whole shooting duration should be at least 30 minutes or longer, so that you able to capture enough photos for longer and better star trails.
Once done with shooting, you can import all the photos into your computer, and we will use a software called Starstax to merge all the photos into a single photo of Star trails.
How To Use Starstax Software to Create Star Trails
There is plenty of free software out there you can use to create Star trails. I prefer StarStaX, it is easy to use and can run on both Windows and Mac OS.
Below is the screenshot of the StarStax interface.
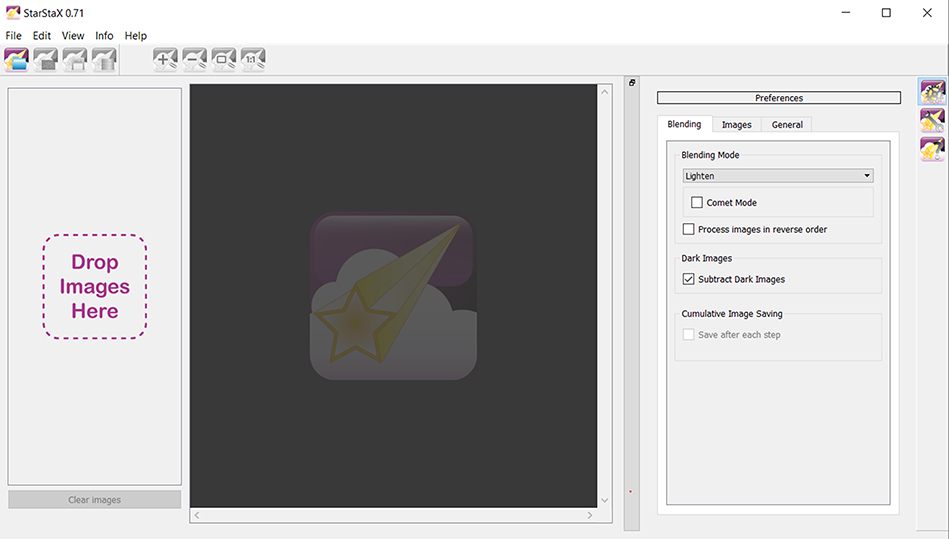
At the StarStaX application, click on the “Open Images” button and select all the photos that you have captured.
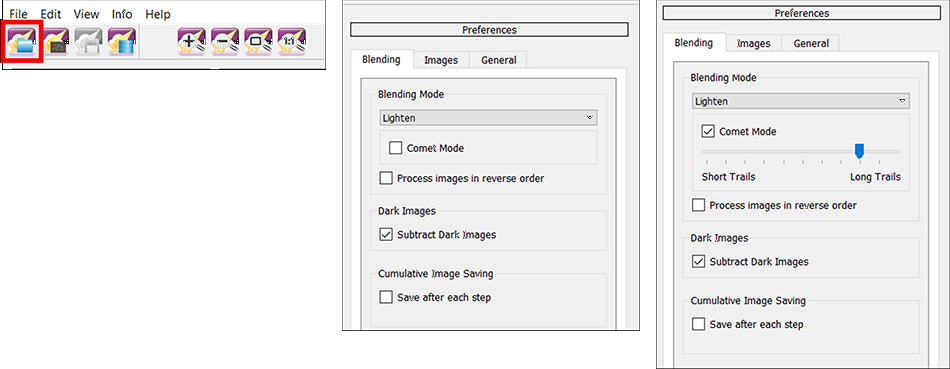
At the right panel, leave the Blending Mode as Lighten, which is the default option. If you check the Comet Mode, it will make the trails fade away, turning the star trails into comets. You can also control the fading effect to have shorter or longer trails.
Personally, I prefer the comets look, so let’s check that option and set for longer trails.
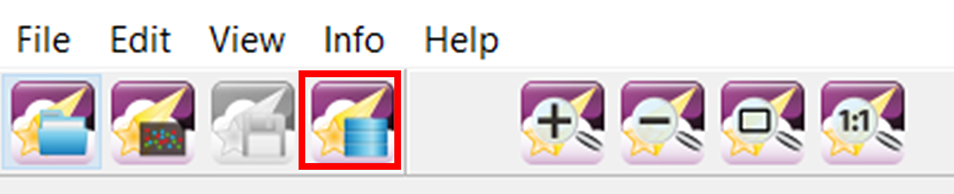
Once done, click on the “Start Processing” button to start creating star trails.
Once, the program finish executing, and you will have your first photo of star trails.
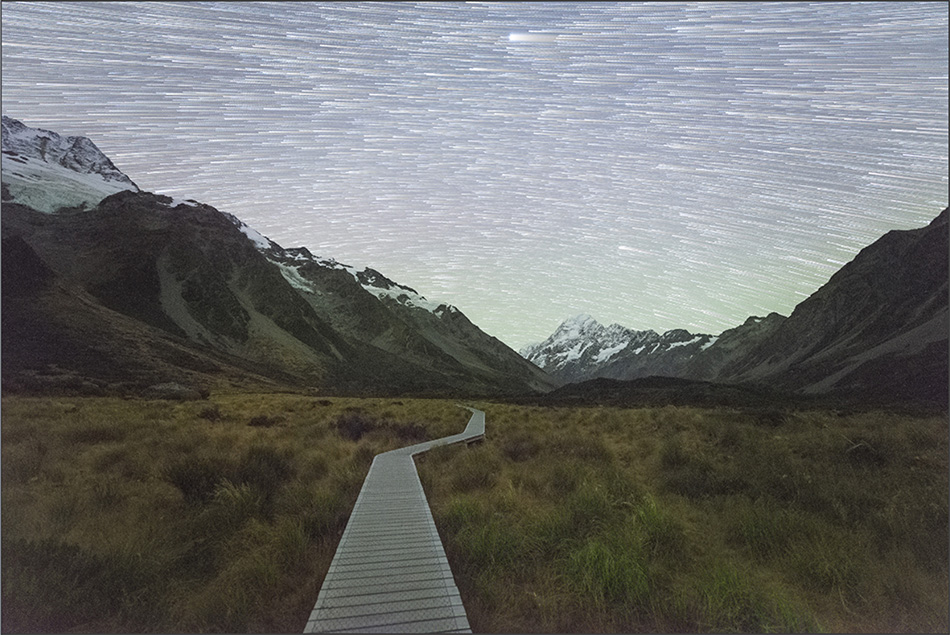
Remember to click on the “Save As” button to save the file. From there, you can start to apply your usual photo editing workflow to enhance the photo.
Summary from Grey Chow Photography
So, that’s all for this article. I hope you enjoyed my article on How To Photograph Star Trails. Happy Shooting! 😊
Grey is an award-winning travel photographer based in Kuala Lumpur, Malaysia. Passionate in Nature Landscape and Astronomy photography. Be sure to check out his website and Facebook page.
Happy shooting!
Other Star Trail Articles
Star Trails Photo Editing Video Tutorial & Step By Step Instructions
Two Methods for Shooting Star Trails Made Easy
How Long Should You Shoot for the Best Star Trails?
Thank you for reading this article on How To Photograph Star Trails, be sure to sign up for our newsletter for more tutorials and great offers.

Enter your email below and join our community of more than 100,000 photographers who have also
Subscribed to our newsletter.
Downloaded our FREE Photoshop Course.
Got our FREE Easy Panel for Photoshop.
And, have our FREE Essential Guide To Luminosity Masks E-Book.
FREE Photoshop Course

The Art Of Photography

Raya Pro for Photoshop
