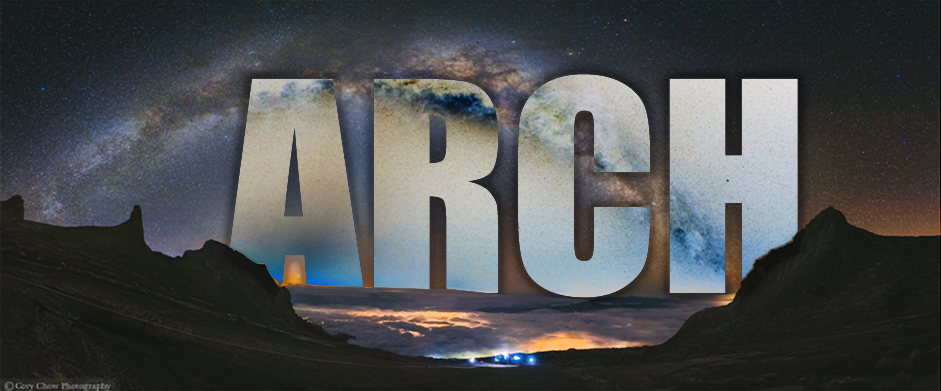
How To Plan & Capture The Full Arch Of The Milky Way
This article on How To Plan & Capture The Full Arch Of The Milky Way is by Grey Chow, If you would like to write for us, please read here.
Panorama photography is a technique that takes multiple photos of a scene and then merges them into a single photo with a wider view of the scene.
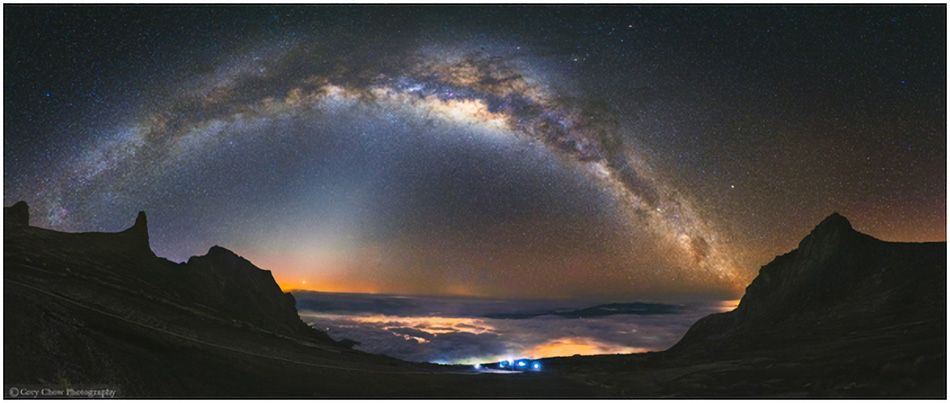
If you use the technique to photograph the Milky Way, not only you can take photos beyond the limitation of your lens focal length, you will be able to capture a complete line of the Milky Way in an arch shape.
In this article, I will share with you How to plan & capture the full arch of the Milky Way
If you wish to experiment with this, I would really appreciate it if you included the name (Grey Chow) and www.shutterevolve.com when you publish your image. If you post your published image on our Facebook page I’d be happy to check it out.
1. Plan Your Shooting During The New Moon
To keep things simple, I suggest taking photos during the new moon and avoid the full moon because the moonlight from the full moon is usually too intense that it washes out most of the stars in the night sky.
2. Find The Right Location
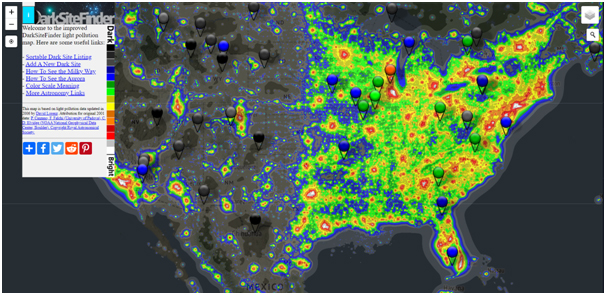
Next, you need to find the right location to photograph the Milky Way. Ideally, a place that’s far from the city with zero or at least minor light pollution. You can refer to any light pollution map on the web to plan your shooting, for example, the Dark Site Finder site (https://darksitefinder.com/maps/world.html#4/39.00/-98.00)
– Tutorial continued below –
Enter your email below and join our community of more than 100,000 photographers who receive regular tutorials and have also

Subscribed to our newsletter,
Downloaded our FREE Photoshop Course
Got our FREE Easy Panel for Photoshop
And have our FREE Essential Guide To Luminosity Masks E-Book
3. Locate The Milky Way
Thanks to all the new technologies, we don’t have to be astronomy experts to find the Milky Way. You just need to download and install an app or software such as Stellarium, Start walk or Start chart.
My personal favourite would be the desktop version of Stellarium software, because of the larger screen view and it is free. So, I’m going to use Stellarium as an example here.
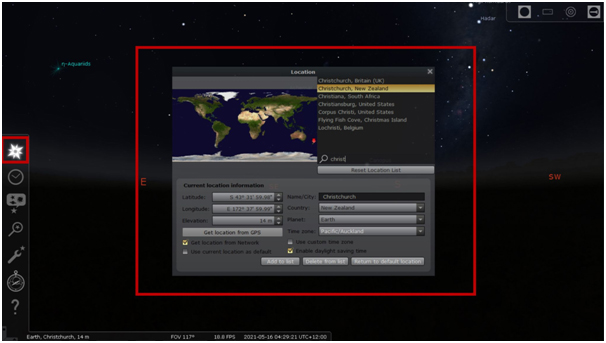
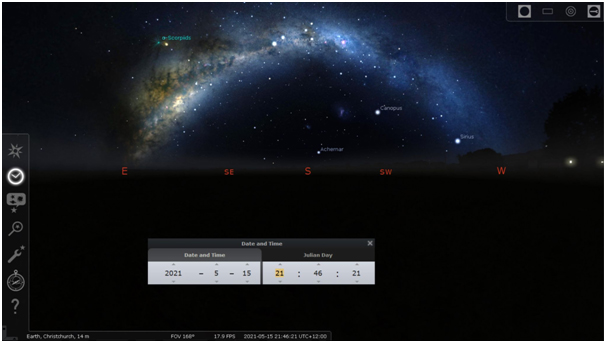
Using Stellarium, you can configure the setting to any desired date & time, making it easier for you to plan your shooting.
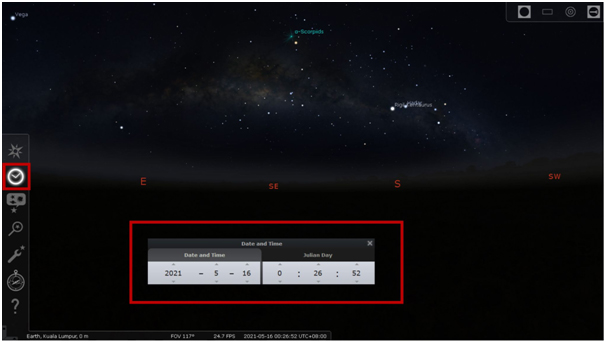
Also, you can change the location to any place in any other country.
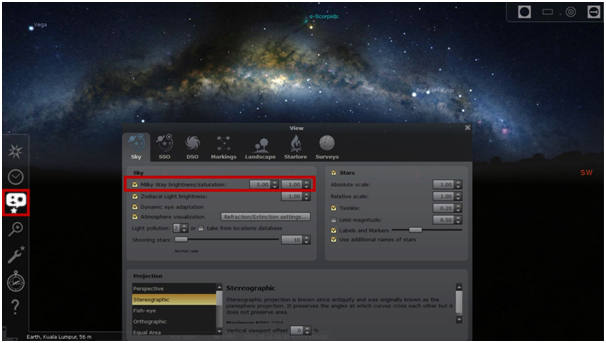
To make it easier for you to see the Milky Way, you can also increase the brightness of the Milky Way at the below configuration screen.
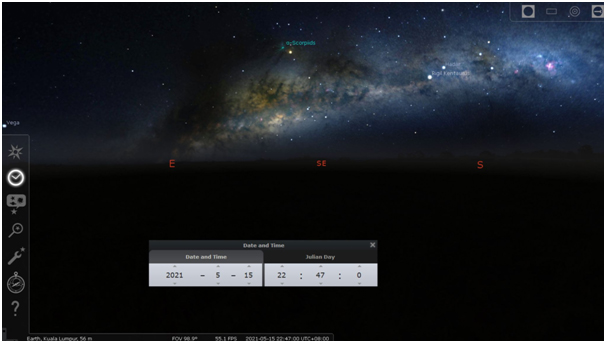
Now, let’s say I plan to take photos on 15-May-2021, I changed the date accordingly and noticed that the Milky Way rise from the east direction at around 10 pm during that day.
By adjusting to a later time, you will notice that the Milky Way has moved higher and appeared longer across the East and South directions.
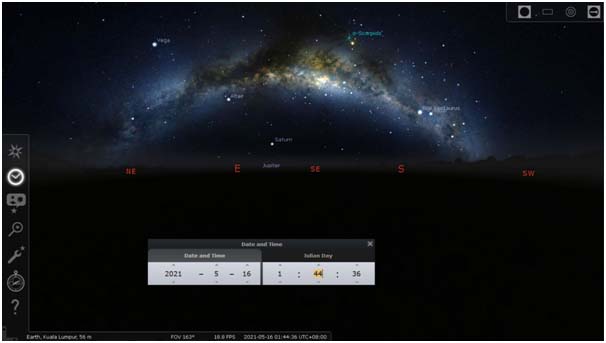
During this time, you can start to take multiple frames of photos from the Northeast direction to the Southwest direction.
Depending on the focal length you use, you may need around 8-10 photos at 14mm to cover the entire arch of the Milky Way.
Also, for a better stitching purpose, suggest having at least ⅓ (or ½) of each frame overlapping each other.

Another thing I want to highlight here is the shooting conditions can be slightly different in different countries. For example, in New Zealand, the Milky Way core is in the East direction, and another end of the line is in the West direction.
Because of that, it is always recommended to plan your shooting ahead so that you have a better idea of which location is more suitable for panorama photos of the Milky Way and at which date & time is the best.
4. Prepare Your Camera
Finally, we are going to talk about camera settings. They are actually the same as how you photograph a single shot of the Milky Way.
Before the shooting, I suggest shooting in RAW format and use Manual shooting mode.
Also, disable the Long Exposure Noise Reduction function on your camera menu.
For White Balance, I prefer to use the kelvin setting and adjust it during the shooting to get the right setting. However, if you are new to Astrophotography, it is okay to set Auto White Balance setting because you can correct it easily in post-processing if you are shooting in RAW.
5. Camera Settings
Now, we are going to set the Aperture, Shutter Speed and ISO. The exposure triangle controls the exposure of the photo.
To keep things simple, you can refer to the below process flow to set the settings.
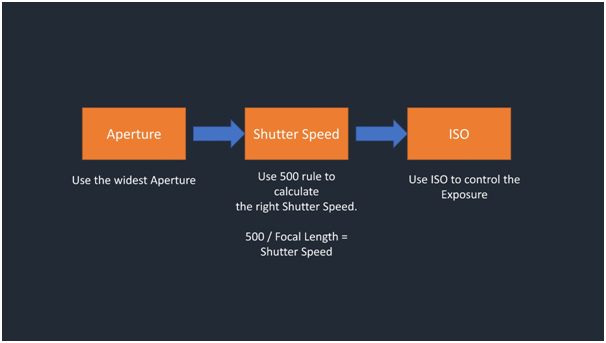
- Aperture – Use the widest Aperture that you have. If it is f/2.8, go for f/2.8; if it is f/3.5, then use f/3.5.
- Shutter Speed – Use the 500 rule to calculate the right Shutter Speed. If you take photos at 24mm focal length, you divide 500 by 24, and you will get 20.8. That’s the max Shutter Speed you can use to avoid getting the Star Trails effect instead of pinpoint sharp stars.
- ISO – Since both the Aperture and Shutter Speed are fixed, the only option for you to control your exposure is adjusting the ISO.
For focusing, you will have to focus manually because Auto Focus won’t work well when shooting in an extremely dark environment. If your lens has the focusing scale, you can point it to the Infinity icon on the scale for infinity focus.
Alternatively, you can also turn on the camera live view and zoom in on one of the brightest stars. Then, turn the focusing ring until the star is in focus.
Most importantly, take a test shot, review the exposure and focus. Then, make any necessary adjustments until you get them right.
6. Taking Photos
Once you have everything set, you take as many photos as needed and rotate your camera between each shot until you cover the entire arch of the Milky Way.
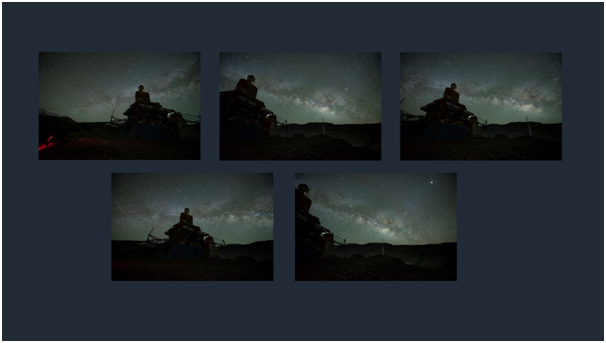
If possible, I suggest you take an extra one frame on both sides to have enough room to crop out the photo after correcting the distortion.
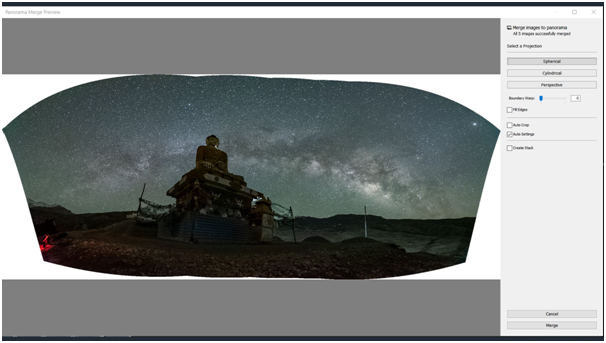
7. Merge Your Photos Into A Panorama Photo

To merge the photos, you can use any editing software with the panorama merging feature, for example, Adobe Lightroom Classic. You can select the set of photos you took and then right-click and choose Photo Merge > Panorama.
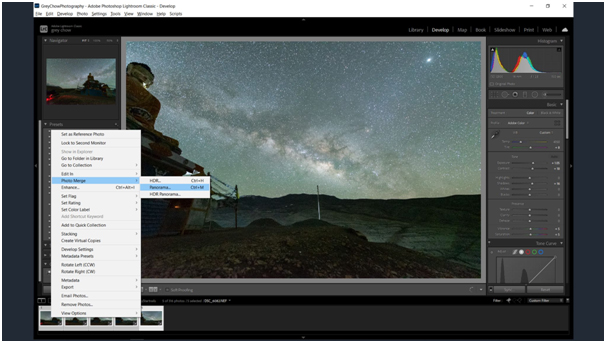
Then click on the Merge button to merge the photos.
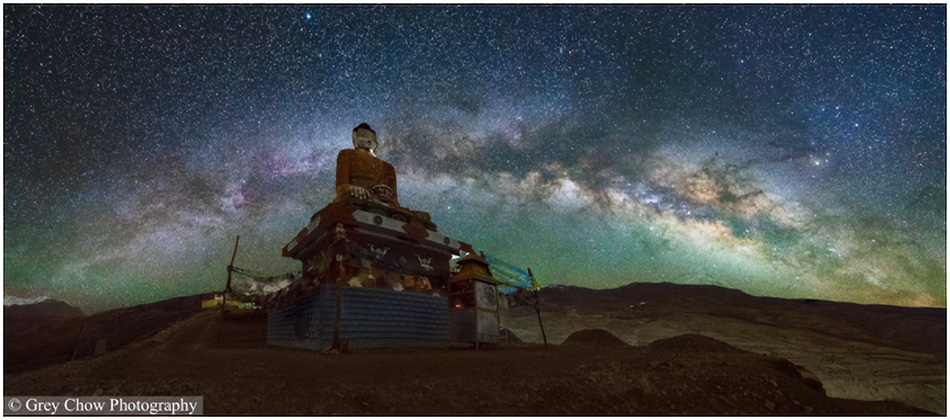
From here, you can apply any necessary adjustments to enhance the photo. Here’s the final output after the editing.
– That’s How To Plan & Capture The Full Arch Of The Milky Way –
That’s all for this article. Happy shooting!
Grey is an award-winning travel photographer based in Kuala Lumpur, Malaysia. Passionate in Nature Landscape and Astronomy photography. Be sure to check out his website and Facebook page.