Save An Image with 300 DPI
For optimal print quality, you need to save your images above 180dpi. It is recommended to save an image with 300 dpi. When we save an image in photoshop it usually saves as a standard 72 dpi. This is fine in most cases but if you want to display or print sharper images then a higher dpi is a must. DPI stands for Dots Per Inch so essentially this is the amount of detail crammed into just 1 inch of an image. The more dots the more detail, with fewer dots images, can appear pixelated. Worse still, in printing having a low dpi can result in colours bleeding into one another which will completely ruin the print. We’ll also share some fixes with you if your Save As Function Not Working In Photoshop.
We have included a FREE Action for you to download and use in Photoshop to set your images to 300 dpi. This short tutorial will show you a method to ensure you save your images with 300 dpi.

Saving An Image In Photoshop With 300 DPI – Automatically
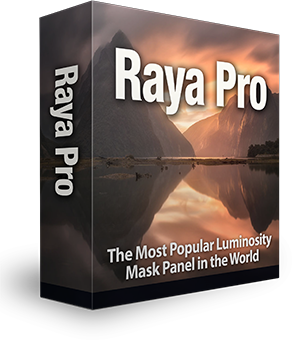
As well as being a world-leading exposure blending plugin and a full editing suite, Raya Pro is also packed with lots of amazing functions including Saving images with 300dpi in Photoshop. Not only that but Raya Pro will also automatically Resize your images, Convert to sRGB (for posting online), and even Sharpen your images for the web in just a few clicks of your mouse. Here is how you can let Raya Pro do all of the work for you in no time at all.
1. Open the Filters and Finish panel in Raya Pro.
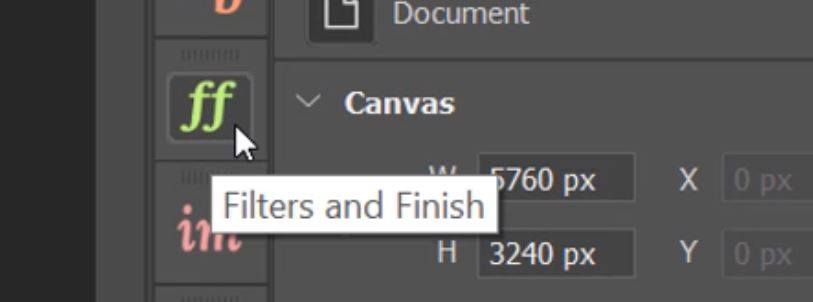
2. You will find a Sharpen and Resize For The Web section.

3. Click on either By Width or By Height. This allows you to determine the size of your image in pixels. So if you only post images 900px wide, you would click on By Width.

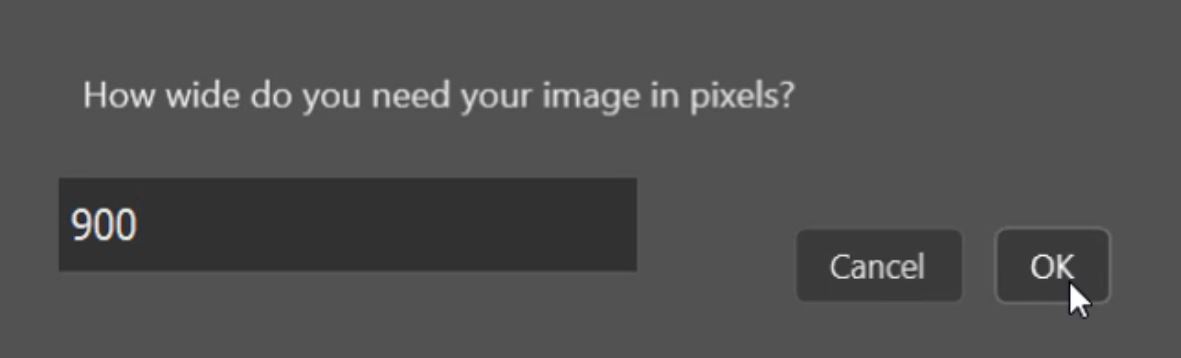
4. A dialog box appears asking you to type in the size you want. Simply type in the size (in pixels) and click OK.
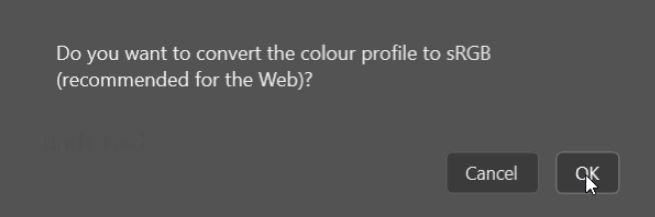
5. Raya Pro then resizes your image perfectly and gives you the option to convert the color range to sRGB (ideal for the web).
6. Then your image will be optimized and in a new window.
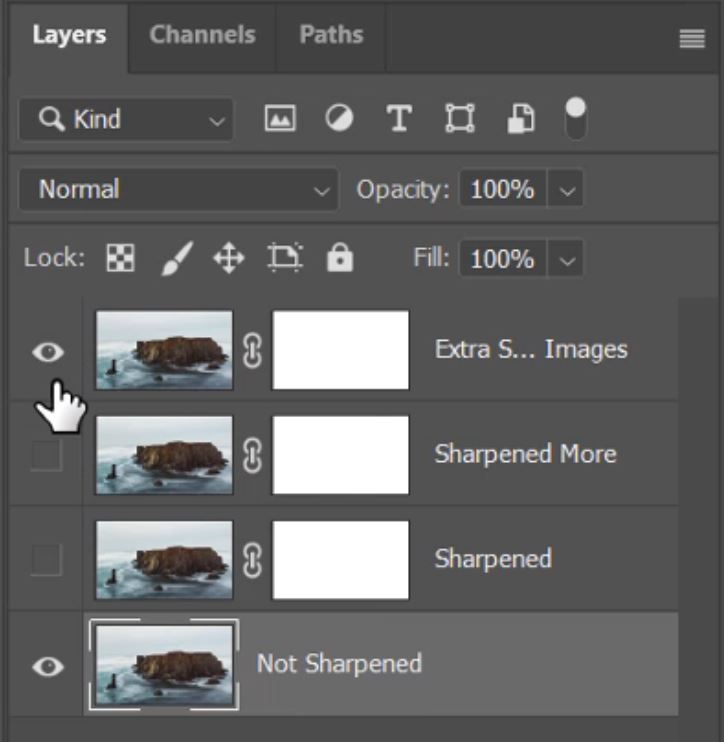
7. You will have various levels of sharpening available as layers. All you need to do is toggle the visibility of the layers until you find the perfect sharpness.
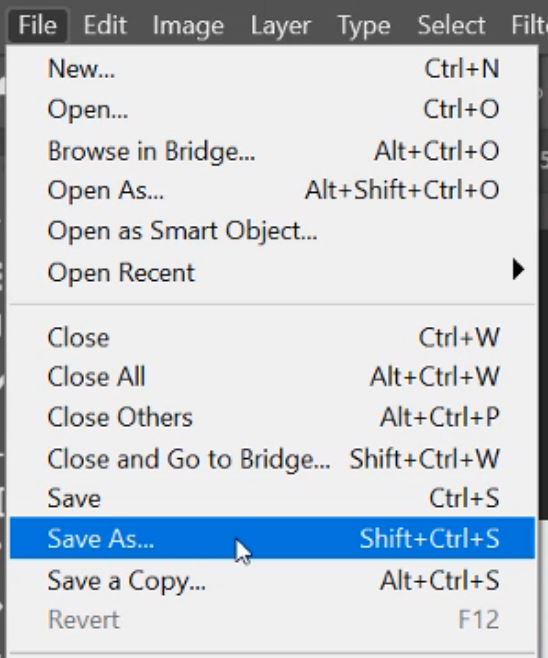
8. Now that your image is fully optimized and sharpened all you need to do now is go to the Save As option in the File menu and save your image ready for posting online.
Editor’s Choice plugin on Adobe marketplace

Raya Pro, the most rated plugin on Adobe Marketplace.
Save As Function Not Working In Photoshop.
If your Photoshop Save as function isn’t working properly, don’t worry. There’s a lot of users out there who are experiencing the same issues so it’s not just you. Following updates in Photoshop CC 2021 or version 22, some of the Save As functions are no longer working. Users can’t save images as a Jpeg in Photoshop. There is a fix for this. In fact, there are two fixes for you to try.
Fix 1: Instead of using the Save As function, try the Save a Copy option just below it. This will have all of the original options.
Fix 2: Go to the Edit menu and at the bottom, you will see the Preferences option. Hover over Preferences then choose the File Handling option. In the top section of the Preferences window you need to ensure there is a tick in the Enable legacy “Save As”. This will restore the original functions in the Save As menu, but it will also disable your ability to save on the Cloud.
Saving An Image In Photoshop With 300 DPI – Manually
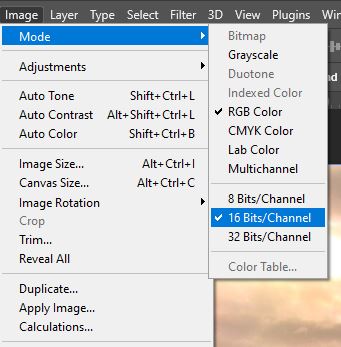
1. Go to the Image menu and under Mode, change the image bit depth to 16 Bit/Channels.
2. Then go back into the Image menu again and this time click on Image Size.

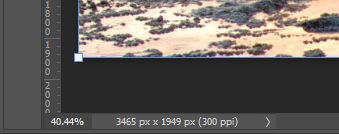
3. To maintain the current image size and only increase the dpi make sure the ‘Resample’ box is unticked.
![]()
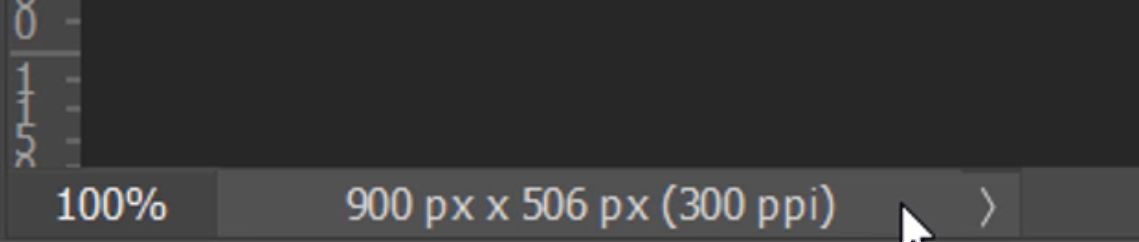
4. Change the value in the resolution field to 300 and click OK.

5. You will see the image size stays the same but the resolution has changed to 300 ppi.
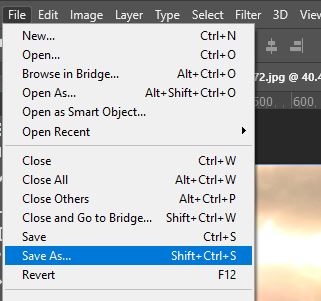
6. To save the image with 300 dpi go to File>Save As…
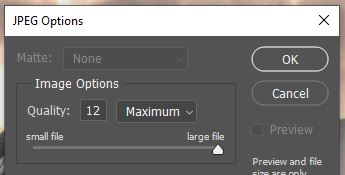
7. Select the file format that you want to save it as, in this case, JPEG.
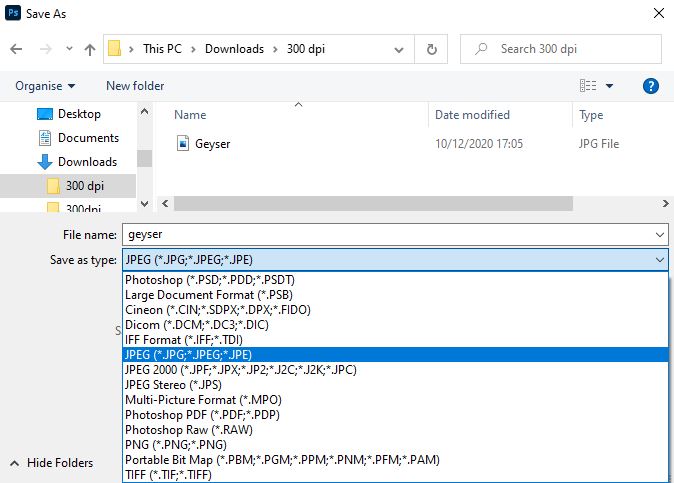
8. Then click the Save button.
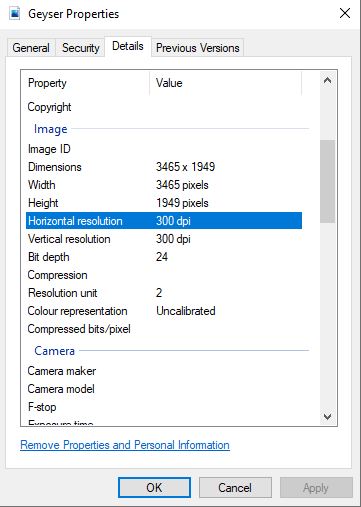
9. Now when we look at the image properties you will see the image now has 300 dpi and is ready for printing.
Download Our FREE Action to Set Your Images To 300 DPI enter your email address below.
Enter your email below and join our community of more than 100,000 photographers who receive regular tutorials and have also

Subscribed to our newsletter,
Downloaded our FREE Photoshop Course
Got our FREE Easy Panel for Photoshop
And have our FREE Essential Guide To Luminosity Masks E-Book
More Articles to Explain Why It Is Important to Print In 300 DPI
Image Resolution: What does 300 DPI really mean, and why does it matter?
Understanding DPI, Resolution and Print vs. Web Images.
All About Digital Photos – Changing the DPI
How to Understand Pixels, Resolution, and Resize Your Images in Photoshop Correctly
Thank you for reading this article on How To Save An Image with 300 DPI in Photoshop, be sure to sign up for our newsletter for more tutorials and great offers.

Enter your email below and join our community of more than 100,000 photographers who have also
Subscribed to our newsletter.
Downloaded our FREE Photoshop Course.
Got our FREE Easy Panel for Photoshop.
And, have our FREE Essential Guide To Luminosity Masks E-Book.
FREE Photoshop Course

The Art Of Photography

Raya Pro for Photoshop
